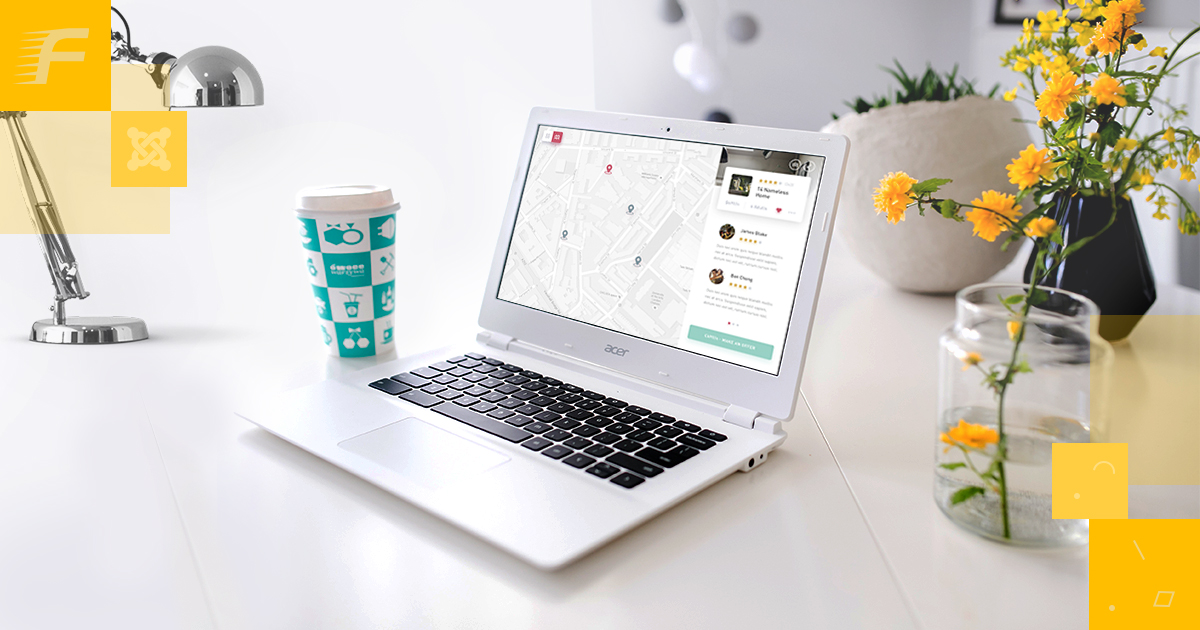
Building Japanese restaurant website with FW Food Menu
Let’s take a closer look at a common Japanese restaurant menu we created with FW Food Menu. Given the right tool, creating a good online menu becomes easy and fun. The final result can be seen at Japanese Restaurant on Demo.
Reading time: 10 mins. Implementation time: 50 mins.
A Japanese restaurant should convey the magnificent spirit of the orient with an elegant and clean layout, carefully chosen colors, and eye-catching images of delicious Japanese food. Our showcase is an awesome example of the online Japanese restaurant menu presenting images of food and descriptions of ingredients. You can create the same menu all by yourself, and you don’t need to be a professional.
The showcase can be applied to any other restaurant type - family style, fine dining, fast food, etc. The only difference will be in meals’ types and the number of categories you will need to create. We will describe each page of the menu, its elements, and the business idea behind each element. Make sure to understand that to proceed with creating the same website you need to prepare media content and install FW Food Menu to your Joomla website. To learn how to get started with FW Food Menu, review Getting started documentation page. If you have media content and FW Food Menu ready, it takes less than an hour to create a similar online menu. The overall process for creating such a menu looks as follows:
1. Prepare media content - meal images grouped by categories/subcategories.
2. Install FW Food Menu to present your online menu with a simple and elegant design that fits your business idea.
3. Create the required categories/subcategories to show different meal item inside them.
4. Display all meal items to show their images, pricing terms, portion sizes, and descriptions.
5. Configure promo options to highlight and style specific meal items.
Check out our Japanese Restaurant Guide for more details on configuring Japanese Restaurant menu. Let’s review the showcase of the Japanese restaurant menu below.
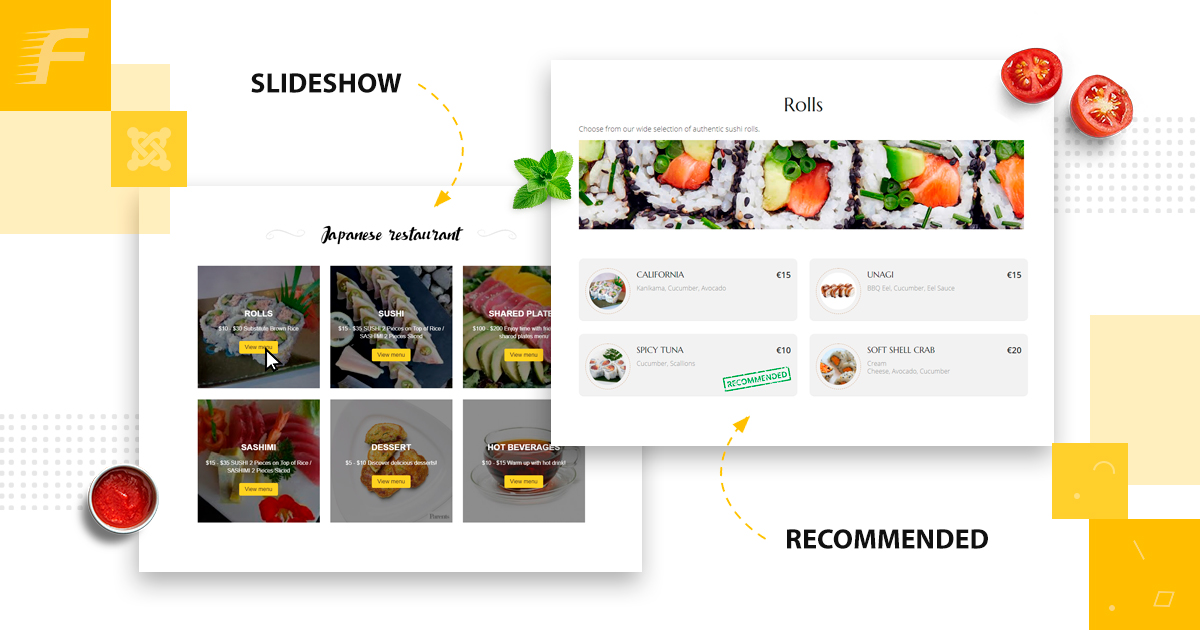
Page with meals categories
A categories page presents the upper level of the menu. It makes it easier for your website visitors to see the entire menu of the restaurant and pick the category of their choice. The categories page looks like a dashboard displaying menu categories and showing meal items images in the slideshow played on hover. Let’s review all of the elements on this page below:

1. Menu item title. A title of the restaurant.
2. Meal categories. The meal categories of your menu. Each category plays the slideshow of meals items images included in the category.
3. Meal category title. A short title of the meal category.
4. Short description. A short description of the meal category. Specify a price range for your meals, the average price or any other specific information using this element.
5. View menu button. Click this button to go to the meals list.
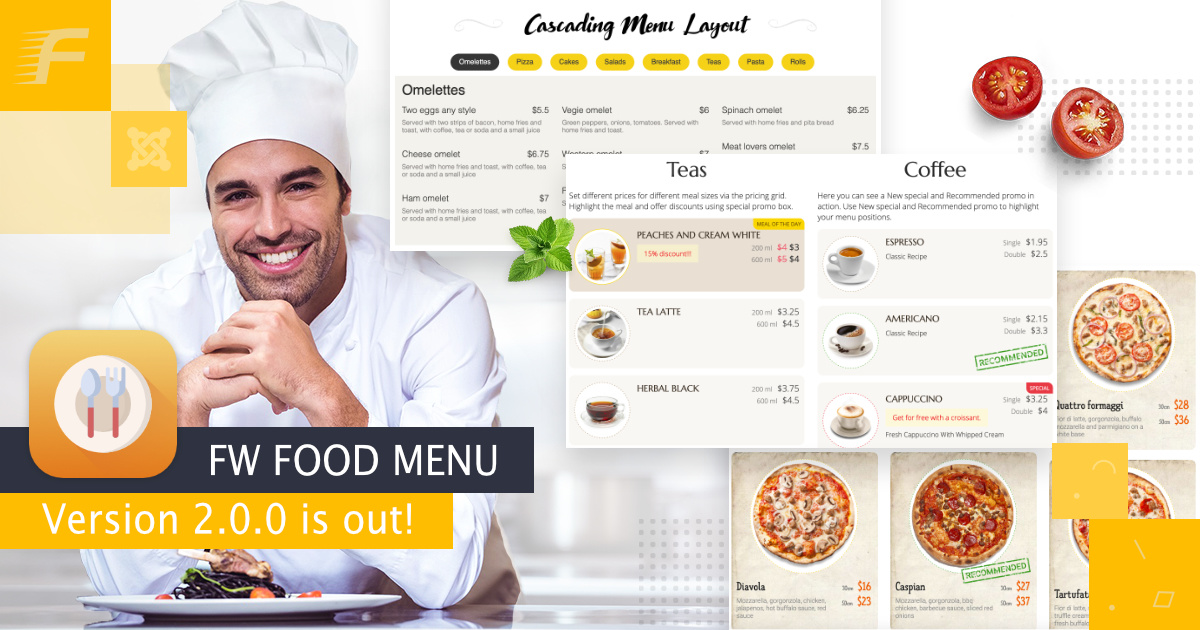
Meals list page
A meals list page displays all meal items included in the category. The first thing you can see upon loading this page is clean and minimalistic menu layout with meal items images which don’t overload it. The image banner at the top of the menu looks engaging and perfectly matches the color scheme. Let’s review all of the elements on this page below:

1. Meal category title. A title of the category you picked.
2. Meal category description. A detailed description of the meal category. Here you can place some general information about all meals included in the category.
3. Meal category image. Upload the image that is shown at the top of the menu to make it look more appealing.
4. Meal items list. All meals included in the meal category. Set background color to add custom styling to your meals list. You can also set a background image as an alternative.
5. Meal image. Upload the image for each meal item if you want to create a menu with images. You can choose to hide meal images if it is needed.
6. Meal title. Specify the title of the meal.
7. Meal description. Give short information about the recipe or specify the ingredients of the meal.
8. Meal price. Specify a meal price. You can add specific pricing terms using this element, for example, add discount price for the meal.
9. Recommended promo. The badge indicating meals that you want people to pay attention to.
Creating an effective online Japanese restaurant menu with FW Food Menu is a simple task. We clearly outlined all steps required for creating such a menu in our Japanese restaurant guide. Should you have any problems while configuring the menu, feel free to ask questions in the comments section at the bottom of the documentation page.