• Home
  • Documentation

Documentation

Outdoor gear group rentals

FW Virtuemart Rental tutorial for Joomla!

Overview and structure

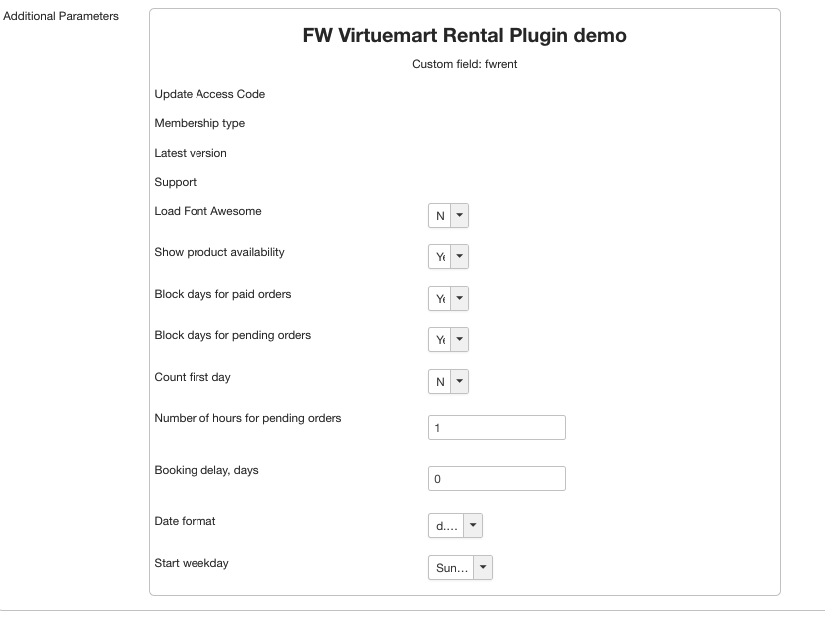
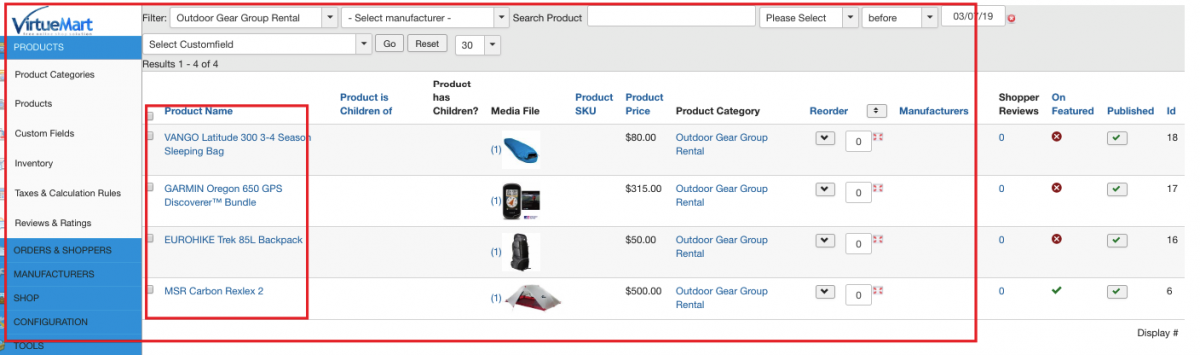
This guide is a detailed reference for creating a rental website with package rental service, based on the FW VirtueMart Rental plugin and FW Package Rental plugin. Have a look at the showcase we have created -

It allows for:

  • Quick package renting
  • Products quantity monitoring
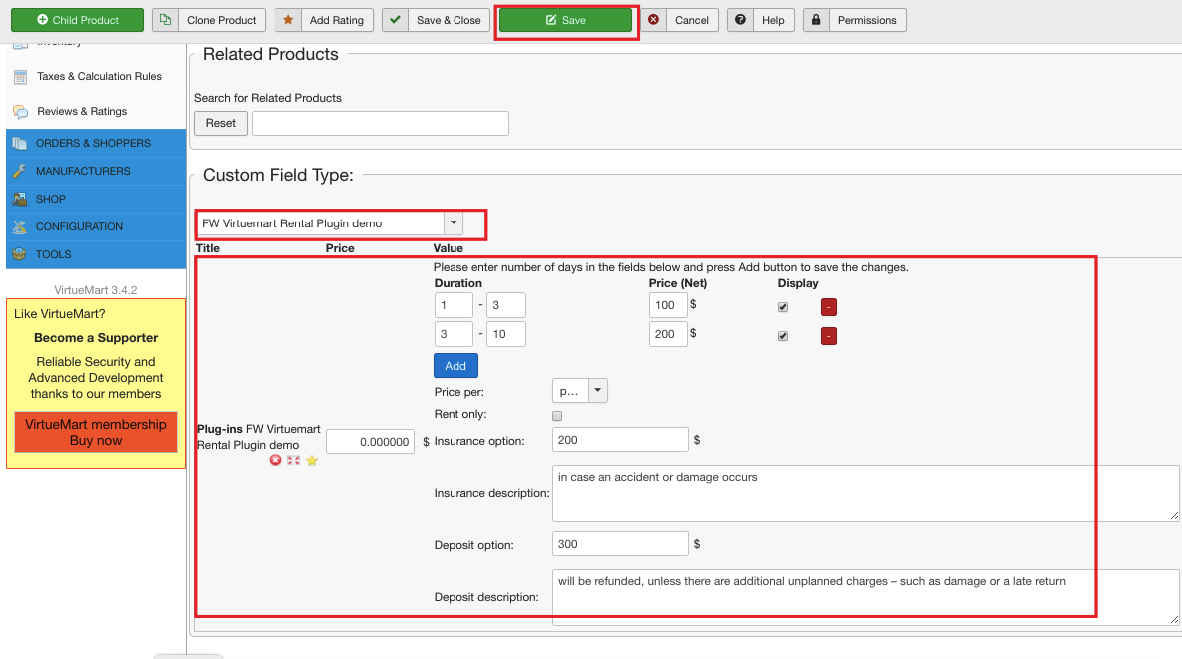
  • Setting flexible pricing terms
  • Setting deposit/insurance terms

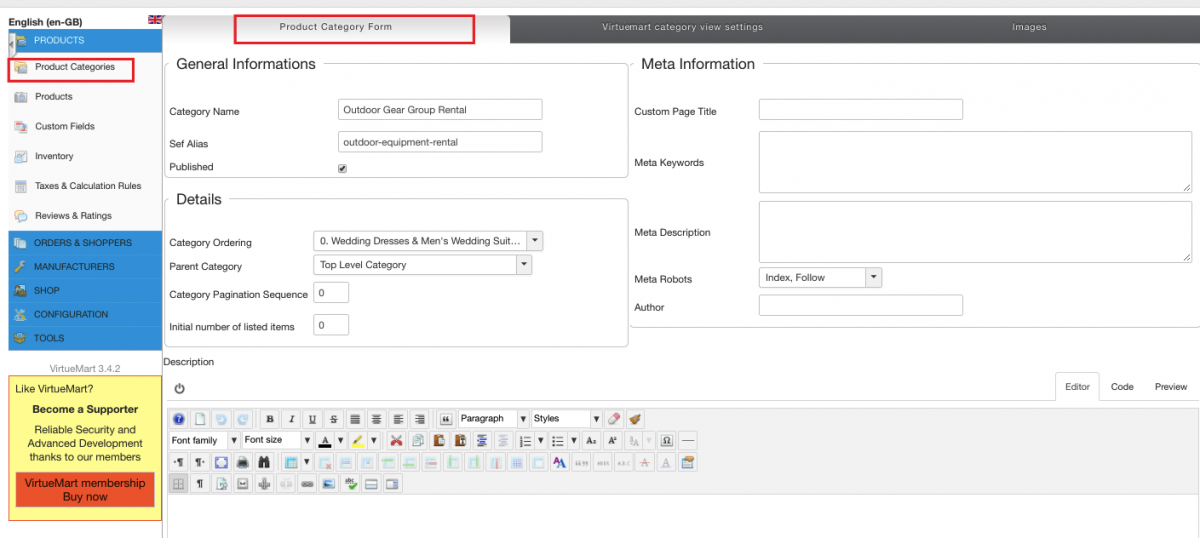
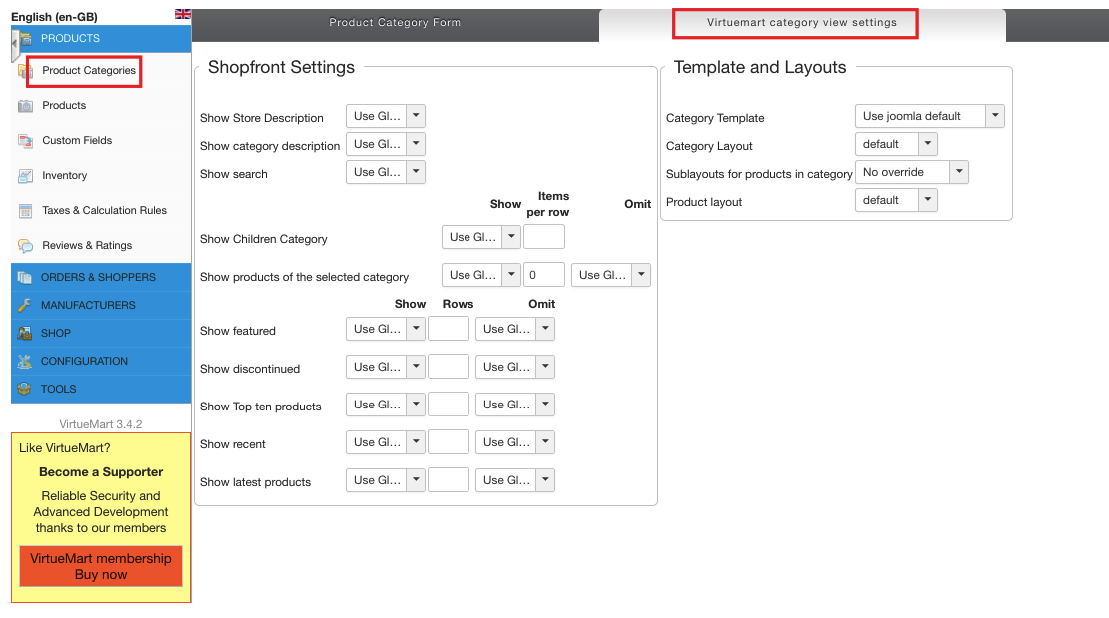
We will describe the process for creating such a website in the following order:

  1. Create a custom field
  2. Create product category
  3. Add products to the category
  4. Display the category with products
  5. Configure and display FW VM Rental Dates Module

Create a custom field

FW Virtuemart Rental plugin works on the basis of VirtueMart component. For that reason, to connect FW Virtuemart Rental plugin to the VirtueMart component, one needs to create a custom field with Plugins type. The overall process for adding a custom field looks as follows:

  1. Add a new custom field via the Custom Fields section on the VitrueMart control panel.

  2. Choose Plugins from the Custom Fields Type dropdown.

  3. Set all required parameters for a new custom field. Review How to add a custom field tutorial to learn more about custom field configuration and settings.

Once the Plugins type is chosen, FW Virtuemart Rental plugin appears in the Additional parameters dropdown. Set FW Virtuemart Rental plugin parameters as is shown on the screenshot below. Make sure to understand that these settings will be applied to all products on your website. Check out our Plugin settings tutorial for more information about each plugin parameter.

  1. Save your configuration.

Create product category

In the showcase, we have created an Outdoor gear group rental category. The overall process for creating a category is as follows:

  1. Locate Product Categories section on VirtueMart control panel.

  2. Click New button.

  3. Enter all settings for a new category as is shown on the screenshots below:

Add products to the category

Once the category is created, you need to add products to it. The overall process for adding a product to the category looks as follows:

  1. Click New in the Products section.

  2. Set all the settings for a new product. Make sure to choose product category. To learn how to add and configure a new product, review How to add a product with FW VM Rental tutorial.

  3. Locate Custom Field tab. Choose the custom field we have created in the Custom Field Type dropdown. As a result, FW VirtueMart Rental plugin parameters show up. These parameters are applied only to the product being added. Set the parameters as is shown on the screenshot below. Check out our How to add a product with FW VM Rental tutorial for more information about each plugin parameter.

  1. Save your configuration.

Repeat steps 1-3 to add each new product to the category. Once all products are added, your admin panel will look similar to the screenshot below:

Display the category with products

Now that you have added the products to the category, let’s display the category on the front-end. The overall process for displaying a category on the front-end is as follows, repeat the steps below:

  1. Create a menu item and assign FW VM Category Layout to it. To learn how to do this, review steps 1-7 of Product display tutorial.

  2. Check if FW VM Rental plugin is enabled following Extensions=>Plugins directory. To learn how to enable the plugin, review steps 8-10 of Product display tutorial.

  3. Check if VM Product plugin is enabled. To learn how to do this, review step 11 of Product display tutorial.

Once you are done, go to the front-end to check how the category is displayed.

Configure and display FW VM Rental Dates Module

Our showcase is dedicated to package rentals. FW VM Rental Dates Module allows for quick renting of several products at a time, on the same dates. Thus, once the dates are entered within the module, they are automatically filled within the plugin for each particular product, and the total rental price gets automatically calculated as well. So you don’t need to rent out each product one by one.

Let’s configure and display FW VM Rental Dates Module.

  1. Locate FW VM Rental Dates Module settings.

  2. Set top content position for the module.

  3. Check if it is enabled.

  4. Go to the front-end to check the result. To learn more about FW VM Rental Dates Module, review Rental Dates module tutorial.

On the screenshot below, you can see that the rental price is already calculated with regard to the specified dates.