 FW Gallery
 FW Food Menu
 FW Virtuemart Rental
 FW Real Estate
VirtueMart is a component adding e-commerce functionality to your Joomla website. In this tutorial, we will learn how to configure a product using FW VM Rental plugin via VirtueMart.
We will proceed as follows:
VirtueMart is a component adding e-commerce functionality to your Joomla website. In this tutorial, we will learn how to configure a product using FW VM Rental plugin via VirtueMart.
We will proceed as follows:
Before using FW VM Rental plugin, you need to install VirtueMart component.
Download VirtueMart installation package from https://virtuemart.net/download.
Install VirtueMart in Joomla. To learn how to do this, review VirtueMart installation documentation.
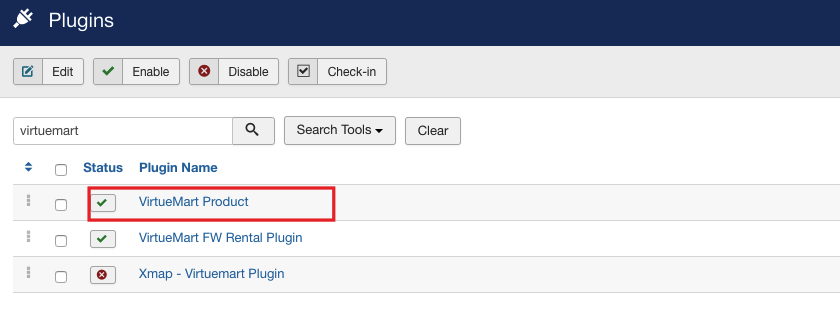
Make sure that VirtueMart Product plugin is enabled in order to insert a product created via VirtueMart component into your Joomla website. To learn how to enable VirtueMart Product plugin, review steps 6-9 of How to install tutorial. Do exactly the same, but with VirtueMart Product plugin.
Having installed VirtueMart component, you can apply FW VM Rental plugin to configure the product for your Joomla e-commerce website. In this section, we will learn how to configure a product via VirtueMart using FW VM Rental plugin.
Once VirtueMart component is installed, you can locate its control panel in either of two ways:
Locate Components dropdown in the top menu of your Joomla control panel and click on it.
Choose VirtueMart=>Control Panel from the list.

or
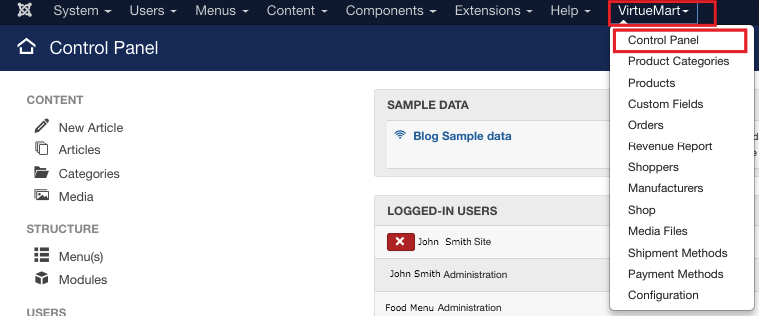
Locate VirtueMart dropdown in the top menu of your Joomla control panel and click on it.
Choose Control Panel form the list.
Before configuring the product, you need to create custom fields. The custom fields are the attributes of the product. They add some configurable criteria to the product making it more customizable for the user. You can select from different types of custom fields - string, time, date, editor, plugins, etc. In our particular case, we will add a custom field with a plugins type in order to apply FW VM Rental plugin. To learn how to do this, follow the steps below.
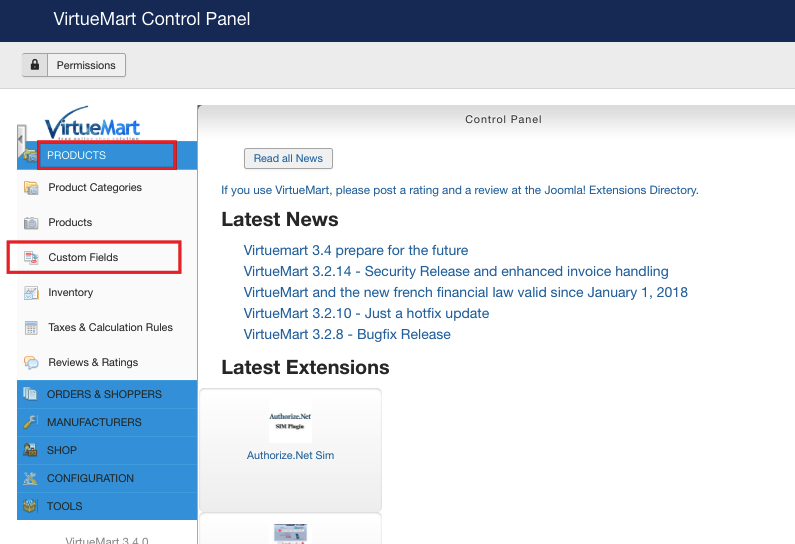
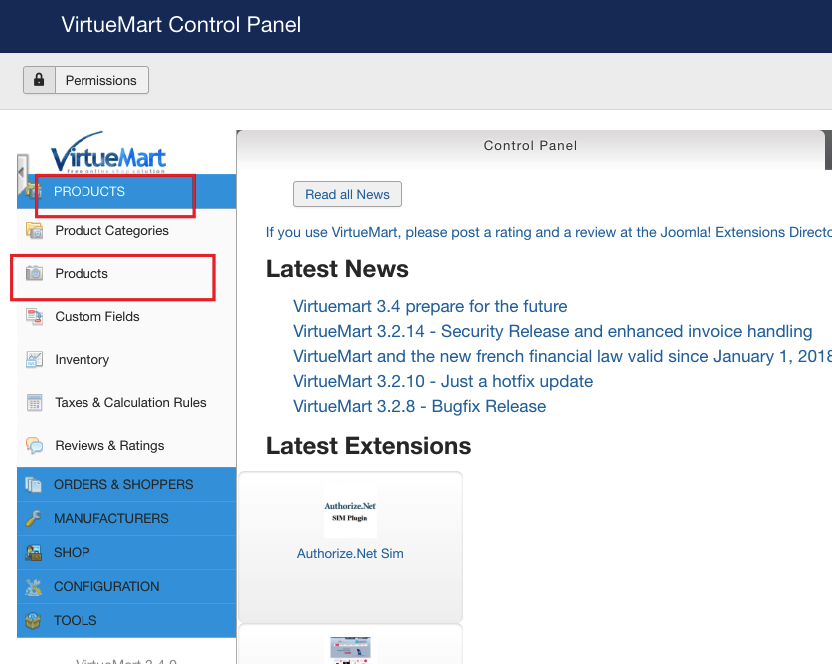
Go to the Products section of VirtueMart control panel.
Locate Custom Fields menu item and click on it.

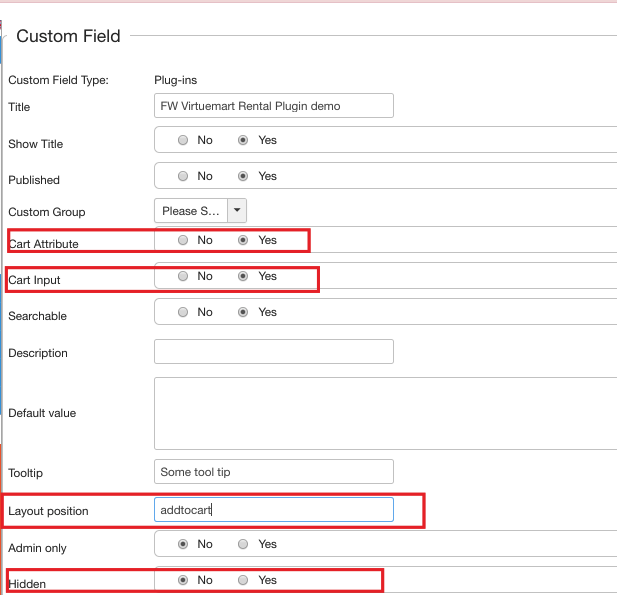
Locate Custom Field Type dropdown and select Plug-ins from the list. Thus, you indicate that the custom field being created will have a plugins type.
Locate Title textbox and enter FW VM Rental into it.
Locate Cart Attribute field and set it as Yes.
Locate Layout position and enter addtocart. You can also assign ontop, normal and onbot positions to a module. Make sure that the template allows for a required position.
Locate Hidden field and choose No. Thus, all plugin parameters will be shown on the front-end of your website.
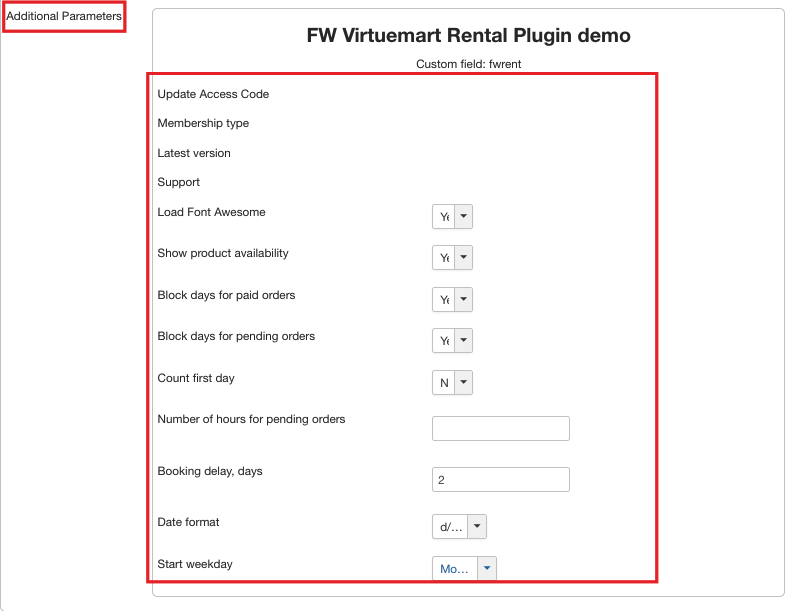
Locate Additional Parameters dropdown.
Select FW VM Rental Plugin from the list. The parameters in this section have the same values as in plugin configuration section so set all the parameters here, in Virtuemart, or go to the plugin configuration. To learn how to set FW WM Rental plugin parameters, review Plugin configuration tutorial.
Click Save button.
Having learned how to add a custom field, let’s learn how to add a product. Please follow the steps below.

To configure a product with FW VM Rental plugin, follow the steps below:
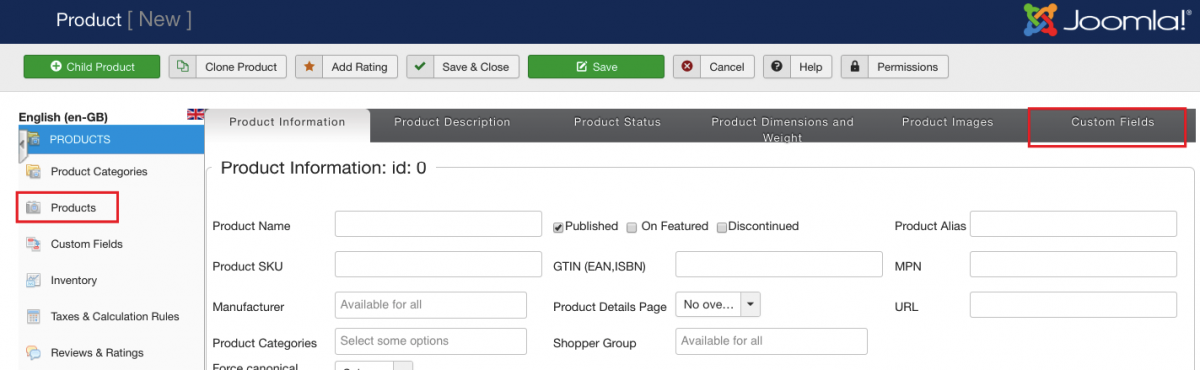
Mouse over Custom Field Type dropdown.
Select FW Rental custom field from the list, the one we have created in the previous section.
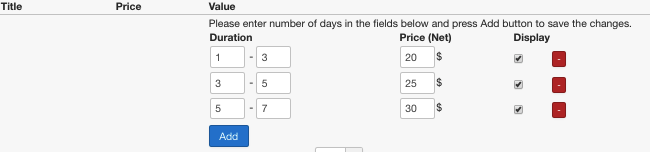
Locate Duration column and enter 1 and 3 into the respective textboxes. Thus, you indicate the rental period of the product.
Go to Price column and enter $20 into the textbox. Thus, you indicate the rental price of the product for a 3 days period.
Locate Display column and check it to display the entered data for the product.
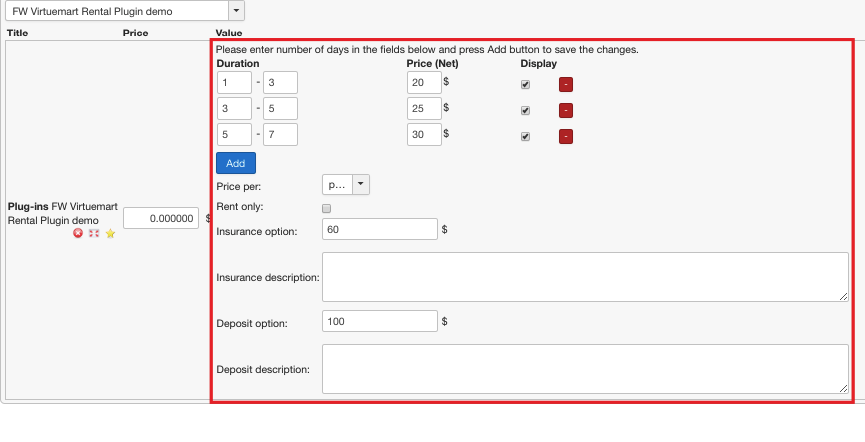
Click Add button and fill in Duration and Price columns as is shown on the screenshot below, the same way we did for steps 4-6. Your screen should look similar to the screenshot below.
Go to Rent only checkbox and leave it empty. Thus, you indicate that the product being created will be available for both rent and sale.
Locate Insurance option textbox and enter $60 into it. Thus, you indicate that $60 will be added to the total rental price in case the insured event occurs.
Add some insurance term in the description field if it is needed.
Locate Deposit option textbox and enter $100.
Add some deposit term in the description field if it is needed.
Click Save button. Your screen should look similar to the screenshot below.
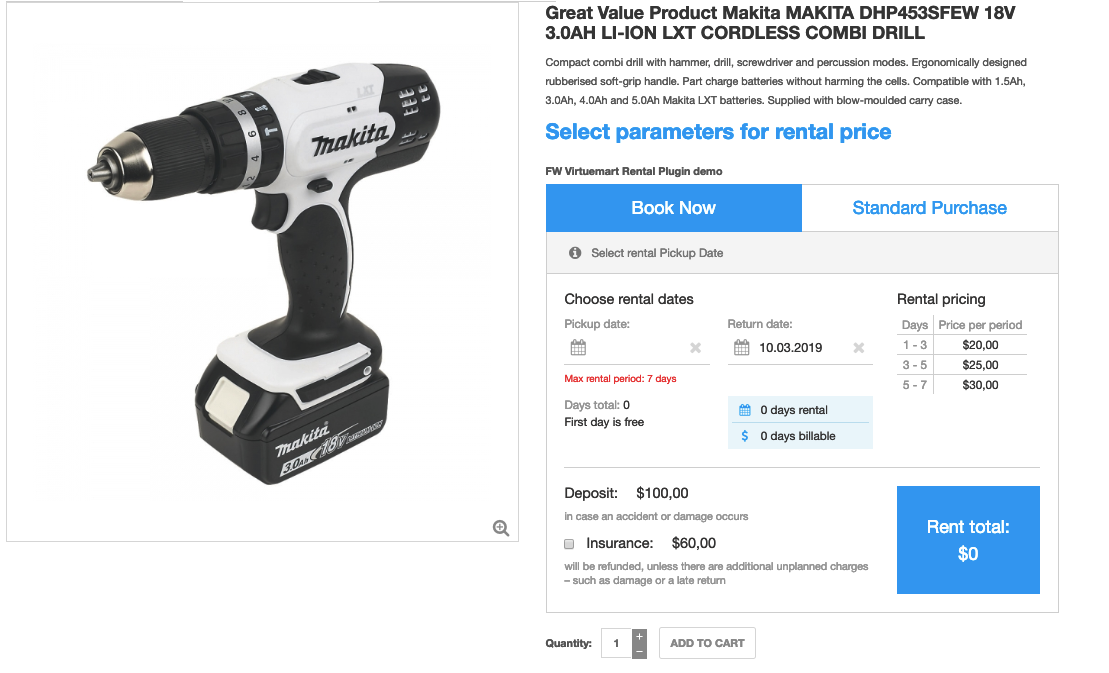
Once the product is created, go to the front-end of your website to review how it is displayed. To learn how to display a product, review Display tutorial.