• Home
  • Documentation

Documentation

Party Rentals

FW Virtuemart Rental tutorial for Joomla!

Overview and structure

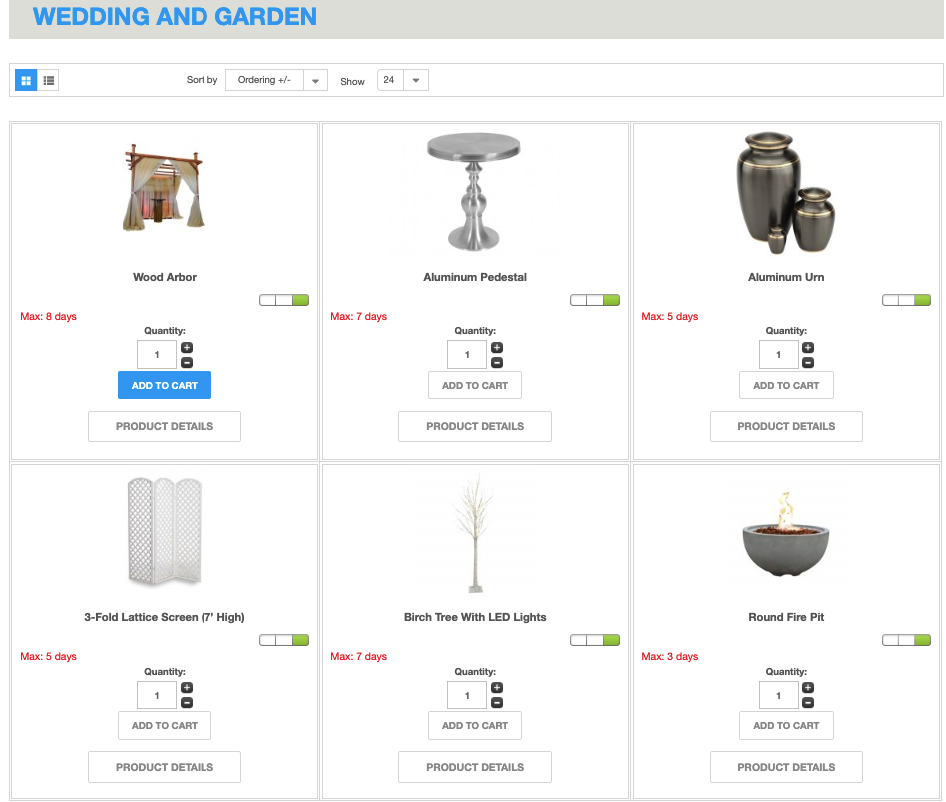
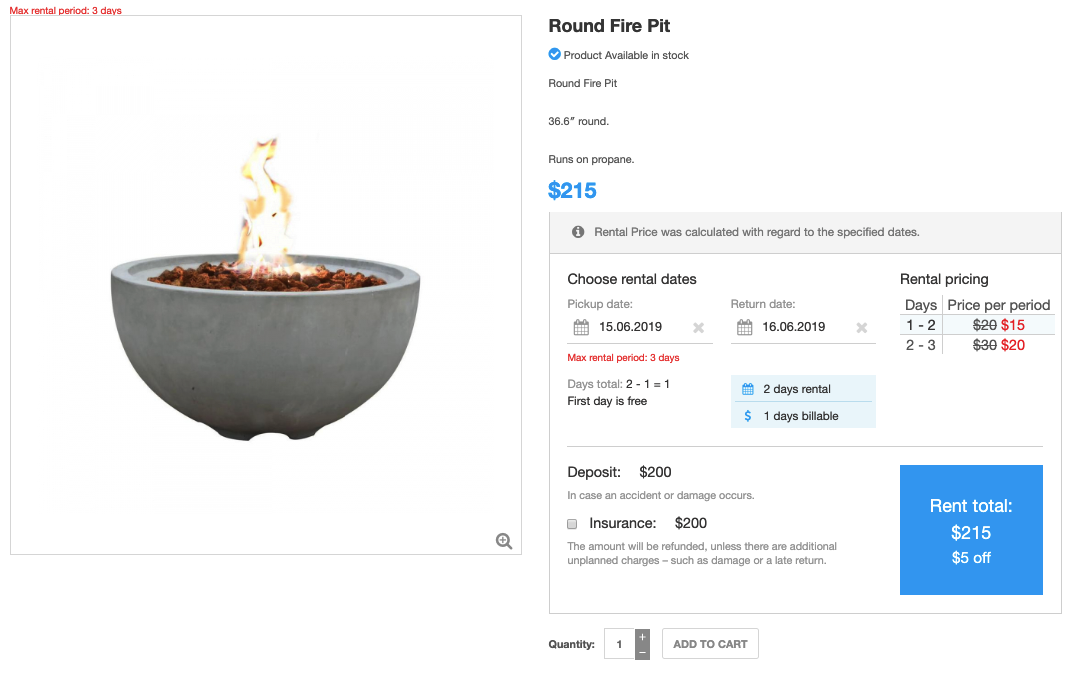
This is a step-by-step guide for creating a common Party Rentals website with booking service with FW Virtuemart Rental. See the final result at Party Rentals on our demo. Following the steps of this guide, you can create a similar rental website for 45 minutes.

The key requirement for getting started with FW Virtuemart Rental is making sure that your Joomla website is pre-installed with VirtueMart component. So before proceeding with creating a party rentals website you need to prepare media content and install FW VM Rental to your Joomla Virtuemart platform.

We will proceed as follows:

Create a custom field

FW Virtuemart Rental plugin works in pair with VirtueMart component. In order to connect FW Virtuemart Rental plugin to VirtueMart component, you need to create a custom field with Plugins type.

The overall process for configuring a custom field is as follows:

  1. Select Plug-ins type for the custom field being added.

  2. Give it a title.

  3. Set Cart Attribute field and as Yes.

  4. Set Cart Input field as Yes.

  5. Enter addtocart Layout position. You can also assign ontop, normal and onbot positions to a module. Make sure that the template allows for the required position.

  6. Set Hidden field as No.

  7. Choose FW VM Rental Plugin in Additional Parameters dropdown and set plugin parameters as is shown on the screenshot below:

  • Set product availability
  • Block days for paid/pending orders
  • Booking delay
  • Date format, etc.

Once you added a new custom field and configured it, your screen should look similar to the screenshots below:

Create product parent and child categories

To create the website structure similar to our demo, create a parent category with its child categories. We created the Party rentals parent category with the following child categories - wedding and garden, portable bars, party furniture, draping, cooking, buffet and serving. The number and titles of the categories may vary upon your business model. The overall process for adding a category is as follows:

  1. Enter the title.

  2. Make sure it is published.

  3. Set it as parent/child.

  4. Upload category image.

Once all needed categories are created and configured, your screen should look similar to the screenshot below.

Add products to child categories

Now that we created all needed categories, let’s add products to them. Set all the settings for a new product. The overall process for adding a product looks as follows:

  1. Configure product information tab.

  2. Add product description.

  3. Set product status.

  4. Set Product dimensions and weight.

  5. Add product images.

  6. Set FW Virtuemart plugin parameters at the product level via the Custom field tab (see the screenshot below):

  • Set pricing terms via a pricing grid.
  • Set discount pricing via a pricing grid.
  • Set if the product is for rent and sale of rent only.
  • Enter deposit/insurance amounts, etc.

Once all products are added to the category, your screen will look similar to the screenshot below:

Display parent and child categories

Now that you have added a custom field, categories, and products to these categories, it is time to display all categories on your website. The overall process for displaying a category is as follows:

  1. Create a Party Rentals menu item and assign FW VM Category Layout to it.

  2. Choose Party Rentals category from the Select Category dropdown to display the category on the Party Rentals menu item.

  3. Check if FW VM Rental plugin is enabled following Extensions=>Plugins directory.

  4. Check if VM Product plugin is enabled.

Once you’re finished configuring menu display settings, go to the front-end to see how your Party rentals are displayed.

Page with party rental categories

Page with party rental category

Product page

Configure and display FW VM Rental Dates Module

Enable package rental functionality for your Party Rentals using Rental Dates Module. Rental Dates Module allows for a quick booking of multiple products at a time for the same dates. Once the dates are entered within the module calendar fields, they are automatically filled within the plugin for each particular product. Consequently, the total rental price gets automatically calculated and displayed right on the category page along with Add to cart button and View details button.

The overall process for configuring FW VM Rental Dates Module is as follows:

  1. Enter the title of the module.

  2. Assign top content position to the module. You can assign any other position to the module to fit it perfectly to the page.

  3. Assign the module to the Party rentals page.

Once all module settings are set, check the result on the front-end.