With FW Real Estate Agency you can add as many properties as you need. In this tutorial, we will learn how to add a property to your real estate website and manage multiple properties within the list.
We will proceed as follows:
With FW Real Estate Agency you can add as many properties as you need. In this tutorial, we will learn how to add a property to your real estate website and manage multiple properties within the list.
We will proceed as follows:
First, let's locate properties section.
Log in to your administrator panel using your credentials.
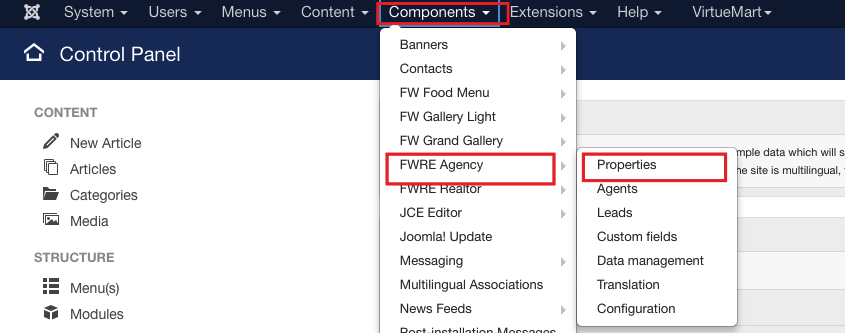
Locate Components dropdown in the top menu of your Joomla control panel and click on it.
Choose FWRE Agency=>properties from the list. You are at the properties tab displaying the list of the properties registered on your website. You can manage your properties list here. To learn how to manage your properties list, review properties#manage">Manage section of this tutorial.
Now, let's learn how to add a property to your website.

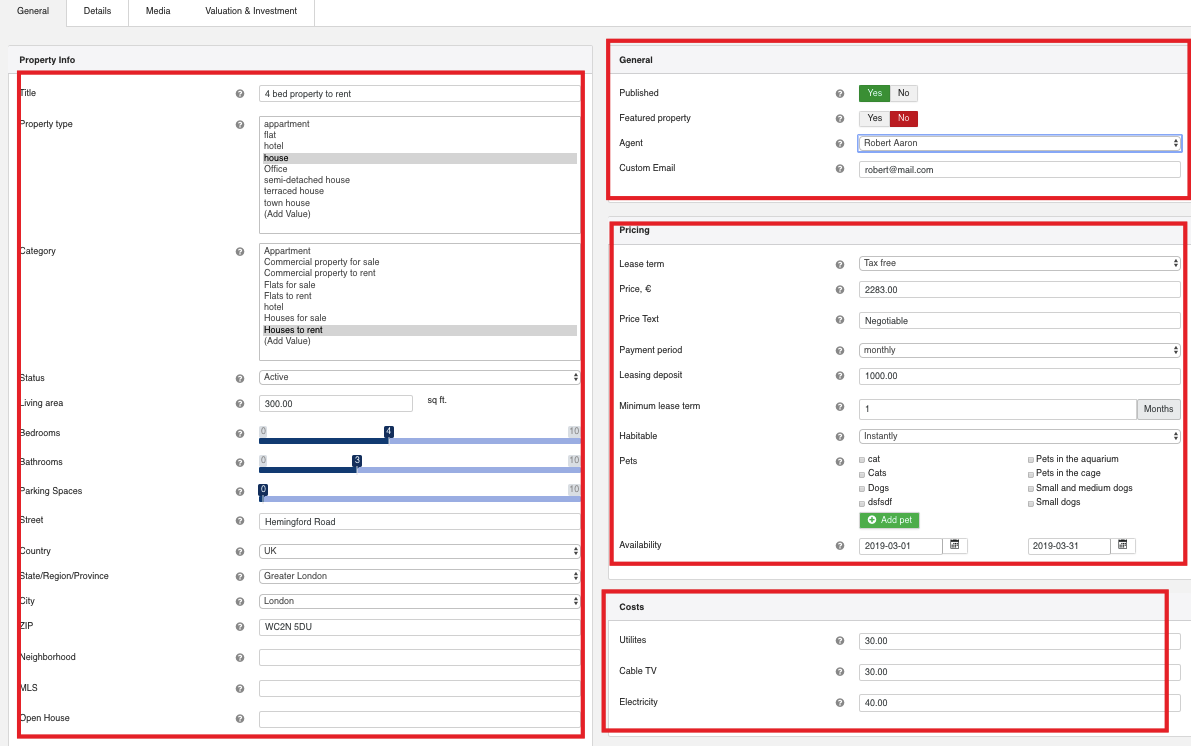
Locate Property Info groupbox.
Locate Title textbox and enter 4 bed property to rent into it.
Mouse over Property Type textbox and enter house into it.
Locate Category textbox and enter Houses to rent.
Mouse over Status dropdown.
Choose Add Value from the list and enter active into it.
Locate Bedrooms slider control and set it to 4.
Mouse over Bathrooms slider control and set it to 3.
Locate Street textbox and enter College Cross.
Mouse over Country dropdown.
Select Add value from the list and enter UK.
Locate State/Region/Province.
Select Add value from the list and enter Greater London.
Locate City dropdown.
Select Add value from the list and enter London.
Locate ZIP textbox and enter WC2N 5DU into it.
Locate Open House textbox and enter Sunday into it.
Go to the General groupbox.
Locate Published field and choose Yes.
Mouse over Featured property field and choose Yes.
Locate Agent dropdown and select the agent form the list. To learn how to add an agent, review Agents tutorial.
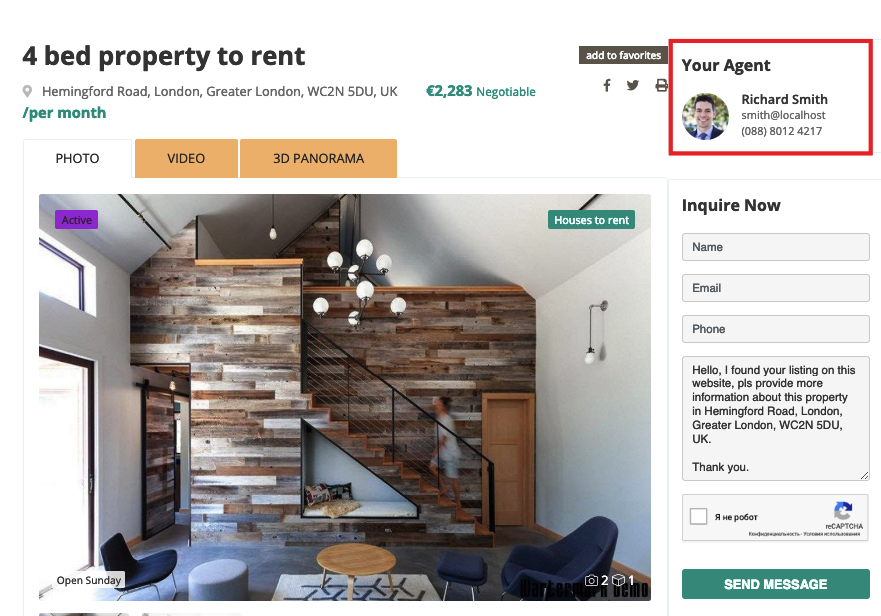
Mouse over Custom Email and enter the email of the agent.
Go to the Pricing groupbox.
Locate Lease Term dropdown and select Per month from the list.
Mouse over Price textbox and enter €2'058 into it. To learn how to set a currency, review Date and currency tutorial.
Locate Price text textbox and enter Negotiable.
Locate Payment period dropdown and select Monthly from the list.
Mouse over Leasing deposit and enter 1000 into it. Thus, you have indicated the deposit amount.
Locate Minimum Lease term and enter 1. The minimum lease term is specified in months.
Locate Habitable dropdown and select Instantly from the list. Thus, you have specified a dwelling term.
Go to the Pets section and check the pets allowed from the list.
Locate Availability calendars and pick 2018-10-01 - 2018-12-01 from them.
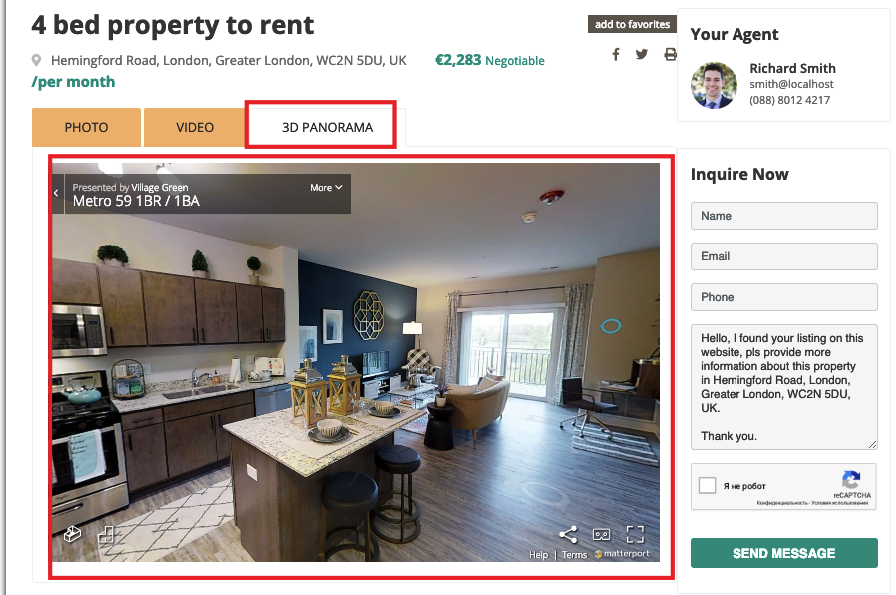
Go to the 3d panorama section and enter the URL of your 3d video. As a result, the 3d panorama will be shown on the single property view.
Go to the Costs section and specify utility costs for your property ad.
Locate Property Description editor area and enter the description of the property being added.
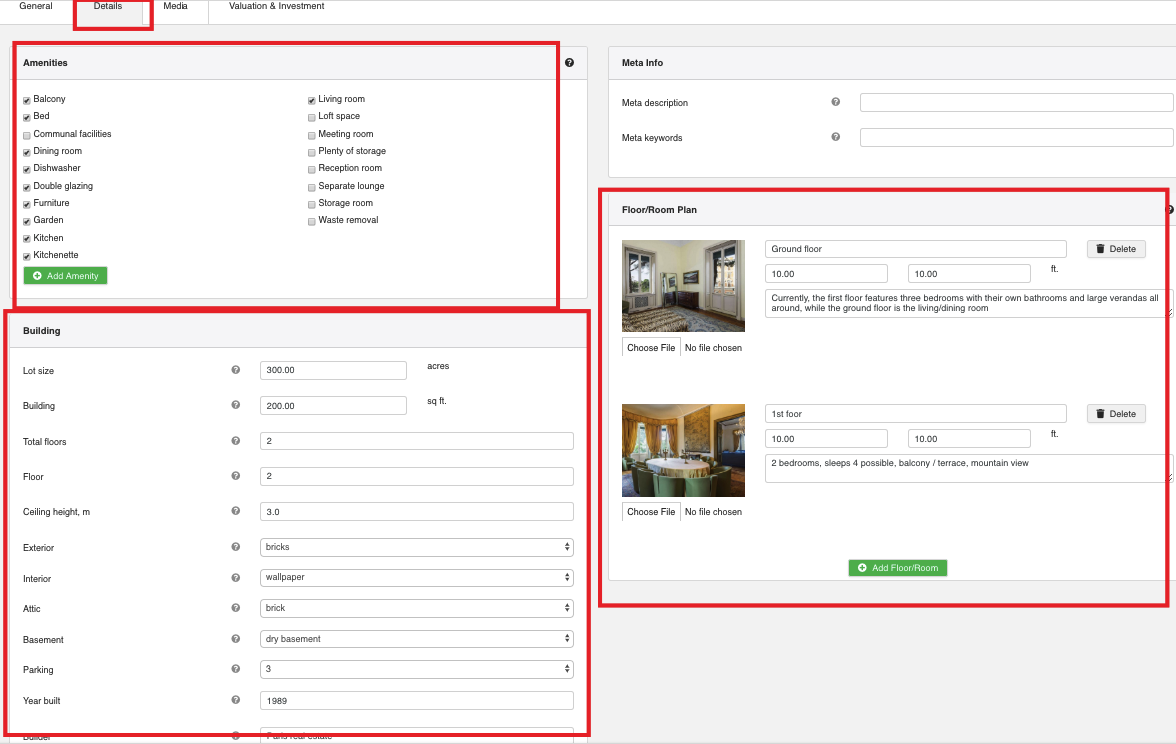
Go to the Details tab.
Locate Amenities section.
Click Add Amenity.
Add Bed and Dishwasher as amenities. Check the rest of the amenities available.
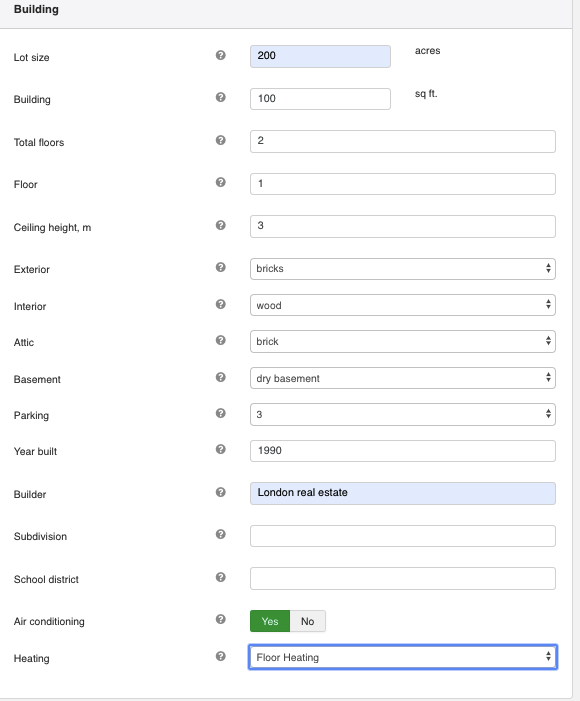
Locate Building section. Fill in the fields as is shown on the screenshot below:
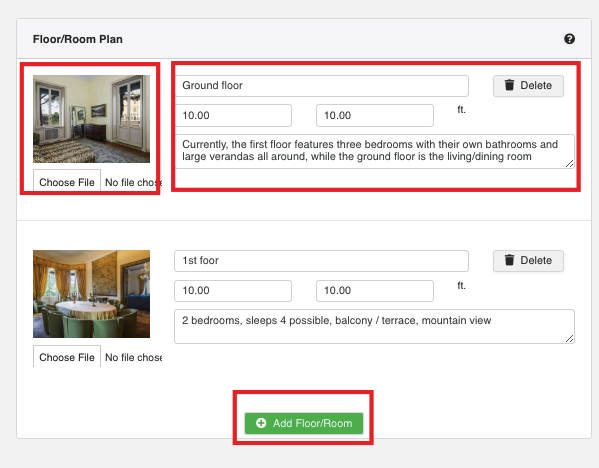
Go to the Floor/Room Plans. This section allows specifying a detailed floor/room plan for your property ad.
Click the Add Floor/Room button and upload the image, write a description, and specify the sizes of the floor/room being added. Repeat the same steps for each room/floor. Once all information is added your screen should look similar to the screenshot below.
Once all settings in Details tab are configured, your screen should look as follows;
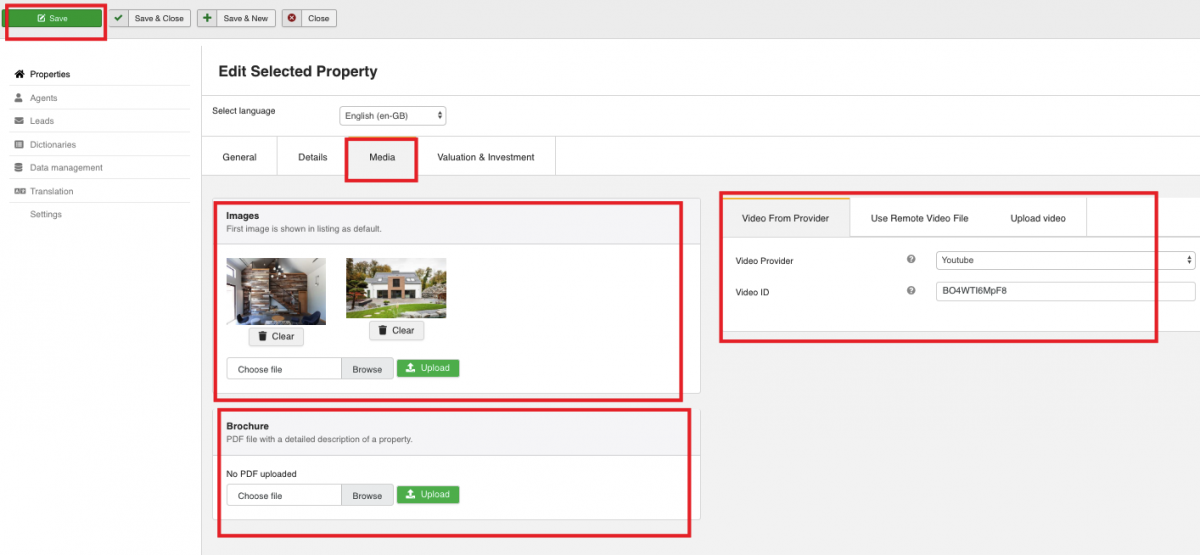
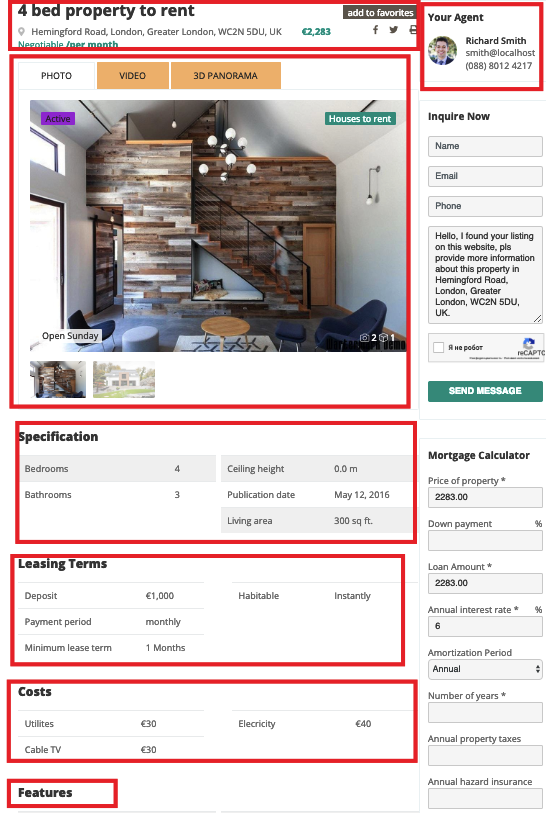
Once the settings are saved, go to the front-end to see how the property you have added is displayed.
You can publish/unpublish, edit, delete, order and mark your properties as featured. Let’s learn how to manage your properties in the subsections below.
You can publish/unpublish a property in either of two ways:
Locate 1 bed property to rent in the properties list.
Locate Title, Address column.
Click Publish/Unpublish button.
or
Check it.
Click Publish/Unpublish button at the top left section of your screen.

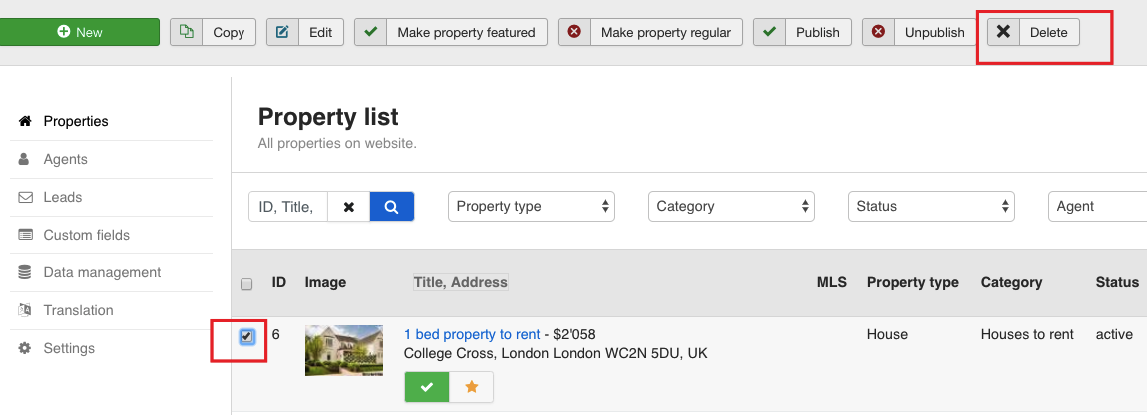
To delete a property, follow the steps below:
Locate 1 bed property to rent in the list.
Check it.
Click Delete button at the top left section of the screen.
To order your properties within the list, do the following:
Find 1 bed property to rent in the list.
Locate Order column.
Enter 1 in the textbox to indicate a sequence number of the property within the list.
Click the button with the arrow to change the property position within the list.
Click Save button to save the order.

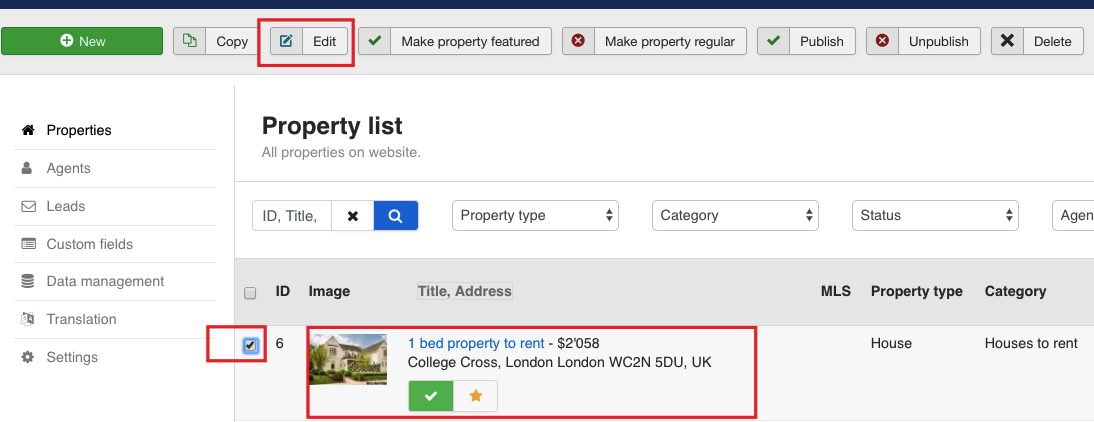
You can edit a property in either of two ways:
Locate 1 bed property to rent in the list.
Click on its photo or name.
or
Check it.
Click Edit button at the top left section of the screen.
You can mark the property being added as featured. Thus, it will be displayed at the very top of the search results page.
Locate 1 bed property to rent in the list.
Mouse over Title, Address column.
Click the button with a star icon.
