• Home
  • Documentation

Documentation

Agents

FW Real Estate tutorial for Joomla!

Agent configuration and settings

As a real estate agency, you should provide accurate and understandable agents' profiles with all needed information on your website. Adding agents with FW Real Estate Agency is not an issue. In this tutorial, we will learn how to add agents to your real estate agency website and manage multiple agents within the list.

We will proceed as follows:

How to add an agent

First, let's locate agents section.

  1. Log in to your administrator panel using your credentials.

  2. Locate Components dropdown in the top menu of your Joomla control panel and click on it.

  3. Choose FWRE Agency=>Agents from the list. You are at the Agents tab displaying the list of agents registered on your website. You can manage your agents listing here. To learn how to manage your agents listing, review Manage section of this tutorial.

Now, let's learn how to add an agent.

  1. Click New button at the top left section of the screen.

  1. Go to the Agent Profile groupbox.

  1. Locate Published field and click Yes.

  2. Locate Name textbox and enter Richard Smith into it.

  3. Go to the Photo section.

  4. Browse for the image file on your PC and upload it.

  5. Locate Tel textbox and enter (088) 8012 4217 into it.

  6. Mouse over Fax textbox and enter (088) 6789045.

  7. Locate Mobile textbox and enter (088) 0948332.

  8. Mouse over Skype textbox and enter Smith_realtor into it.

  9. Locate Agent Description editor area and enter your description into it.

  10. Go to the Joomla User profile groupbox.

  1. Locate Name textbox and enter Richard Smith into it.

  2. Mouse over User Name textbox and enter RichardSmith into it.

  3. Locate Password and enter your password into it.

  4. Locate Password Confirmation textbox and enter the same password to confirm it.

  5. Locate Company Profile groupbox.

  1. Mouse over Company Name textbox and enter Best Realtors into it.

  2. Locate Company Logo section.

  3. Browse for the image file on your PC and upload it.

  4. Locate Address textbox and enter USA, Washington, 6th St SW into it.

  5. Go to the Website textbox and enter fastw3b.com into it.

  6. Click Save&Close button. Your screen should look similar to the screenshot below:

Once the settings for the new agent are saved, go to the front-end to see how it is displayed on the front-end.

How to manage agents within the list

You can publish/unpublish, edit, delete, and order your agents within the list. Let’s learn how to do it in the subsections below.
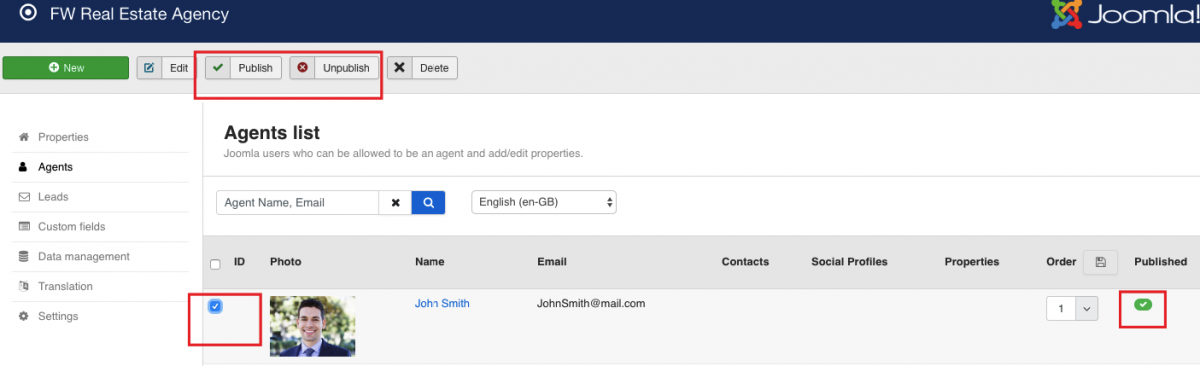
Publish/Unpublish

You can publish/unpublish the agent in either of two ways:

  1. Locate John Smith in the list.

  2. Locate Published column.

  3. Click Publish/Unpublish button.

or

  1. Check it.

  2. Click Publish/Unpublish button at the top left section of your screen.
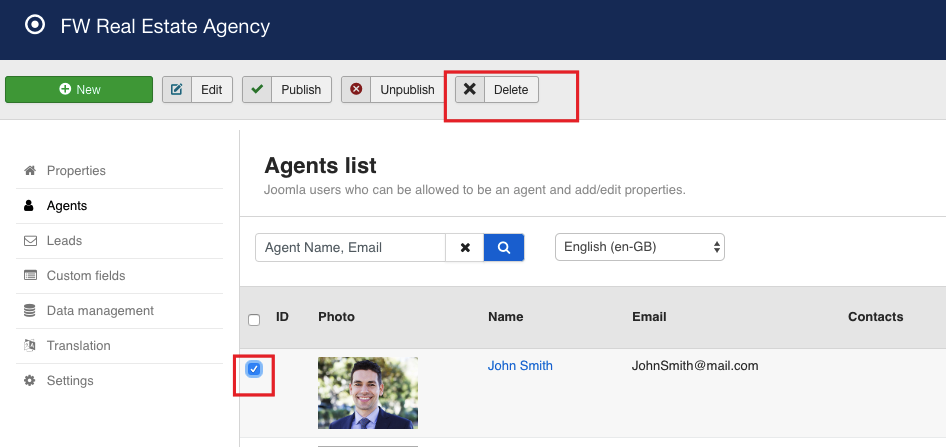
Delete

To delete an agent, follow the steps below:

  1. Locate John Smith in the list.

  2. Check it.

  3. Click Delete button at the top left section of the screen.
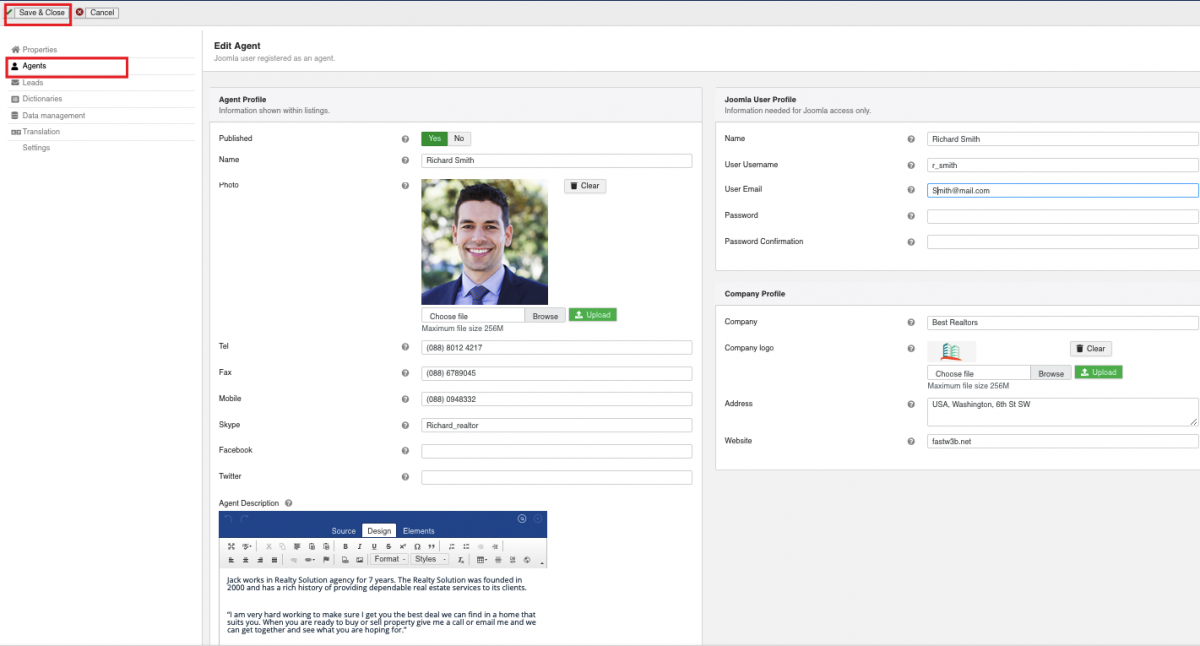
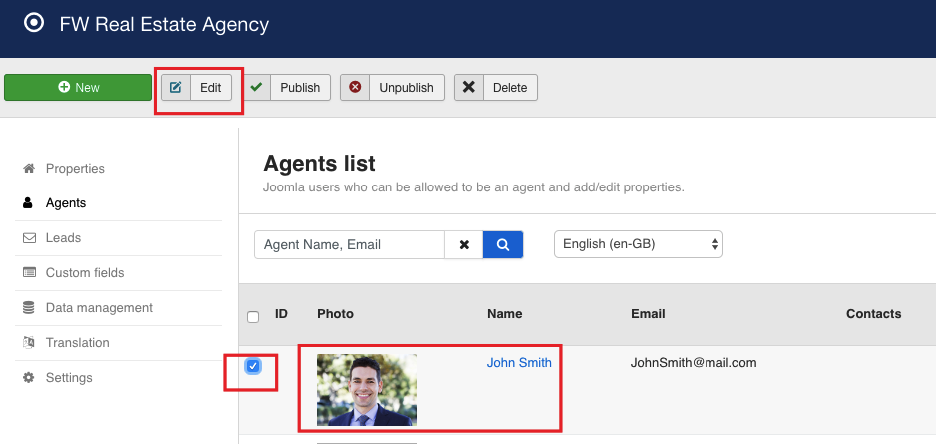
Edit

You can edit an agent in either of two ways:

  1. Locate John Smith in the list.

  2. Click on its photo or name.

or

  1. Check it.

  2. Click Edit button at the top left section of the screen.
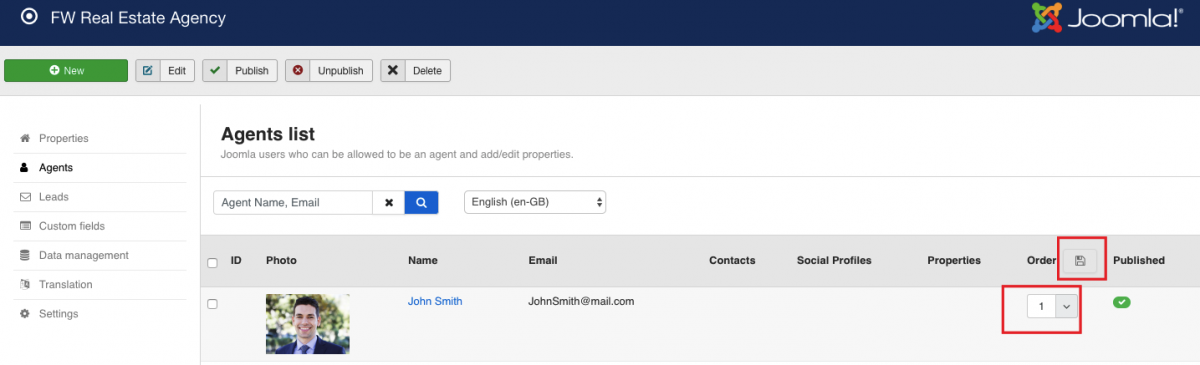
Order

To order your agents within the list, do the following:

  1. Find John Smith in the list.

  2. Locate Order column.

  3. Enter 1 in the textbox to indicate a sequence number of the agent within the list.

  4. Click the button with the arrow to change agent's position within the list.

  5. Click Save button to save the order.
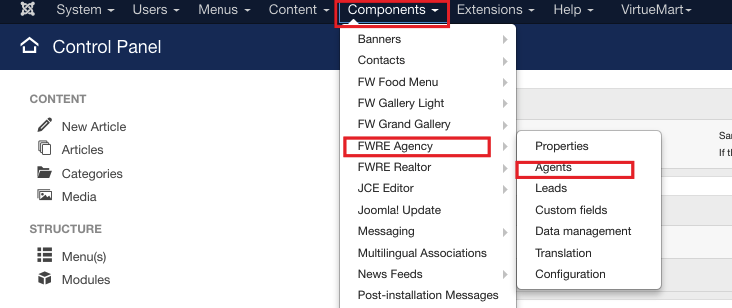