Documentation

Dictionaries

FW Real Estate tutorial for Joomla!

Dictionaries configuration and settings

With FW Real Estate you can define your own details for the properties you want to display on your website such as property categories, countries, amenities, and many more. This can be done via the Dictionaries section. You can add new values to the Dictionaries fields in two ways: via the Dictionaries fields section or on the go while adding a property. If the values are added on the go, these values will be automatically displayed in the Dictionaries section. In this tutorial, we will learn how to add new values to the Dictionaries section and manage them accordingly.

We will proceed as follows:

How to add a new value to the Dictionaries section

First, let's locate the Dictionaries section.

  1. Log in to your administrator panel using your credentials.

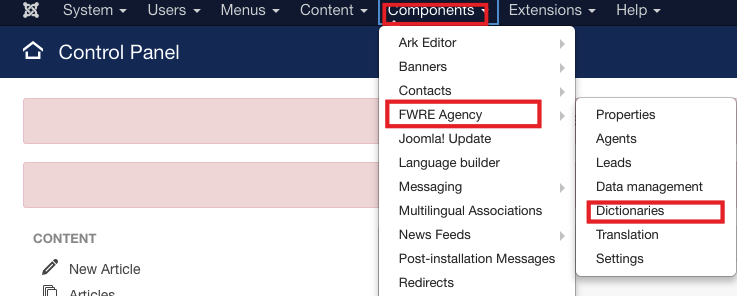
  2. Locate Components dropdown in the top menu of your Joomla control panel and click on it.

  3. Choose FWRE Agency=>Dictionaries from the list.

Now, let's learn how to add a new value to the field. In the Dictionaries section, you can assign new values to the categories of fields. There are various categories of fields such as status, country, currency, etc. You can add as many values as you need to these categories.

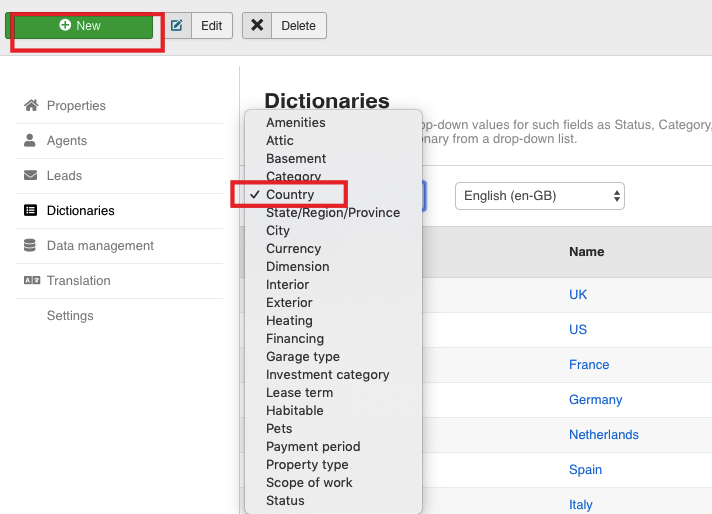
  1. Locate the Dictionaries dropdown.

  2. Select Country from the list.

  3. Click New button at the top left section of the screen.

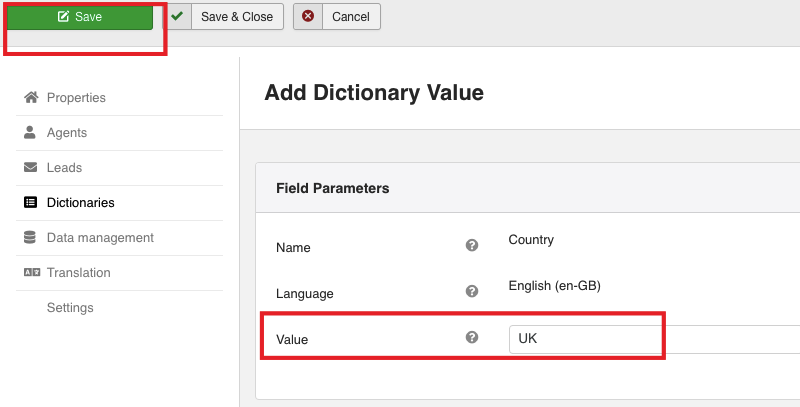
  1. Locate Field parameters section.

  2. Mouse over Value textbox.

  3. Enter UK into it.

  4. Click Save button.

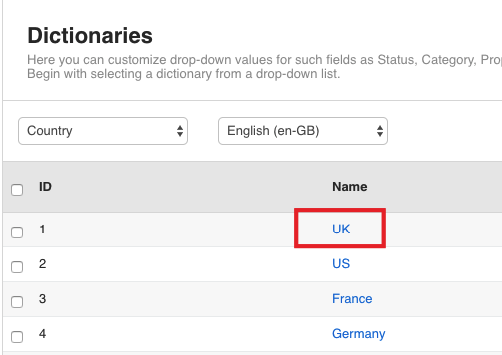
As a result, a new value appears for the Country category.

How to manage the Dictionaries values

You can edit and delete the Dictionaries' values.

Edit

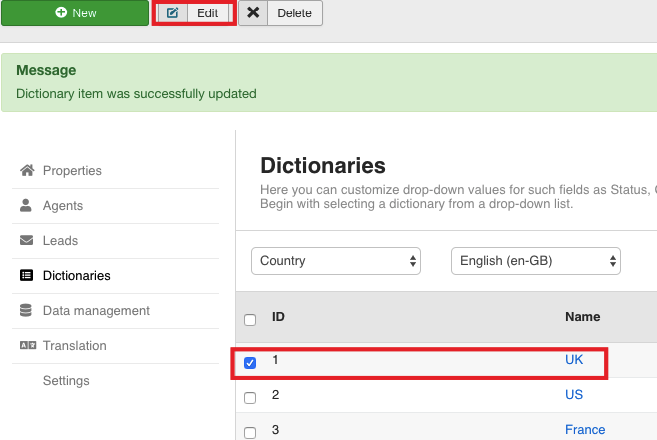
To learn how to edit a field, follow the steps below:

  1. Locate UK value in the list.

  2. Check it.

  3. Click Edit button.

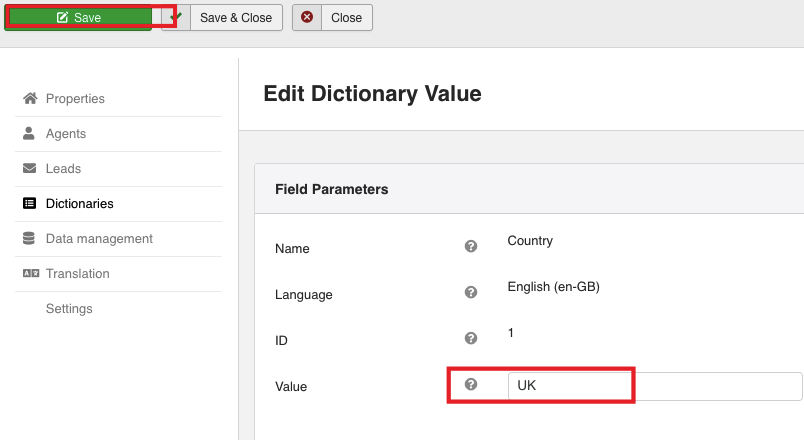
  1. Locate Field parameters section.

  2. Edit the name of the value and click Save button.

Delete

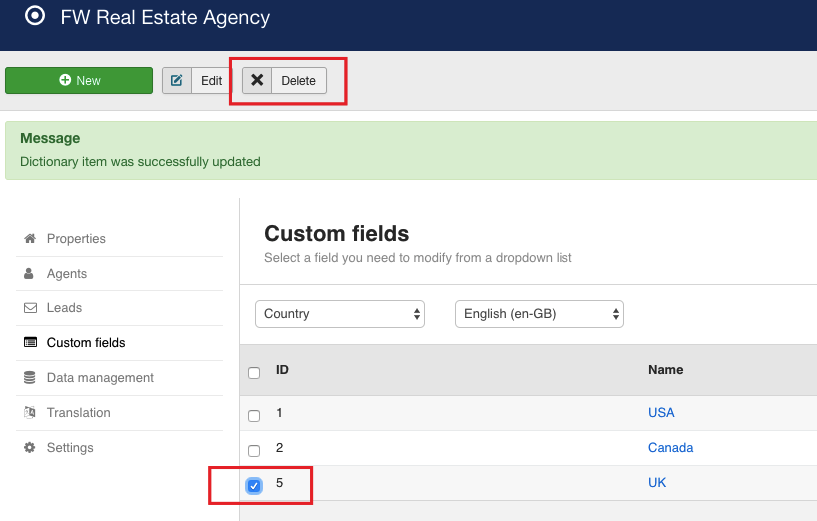
To learn how to delete a Dictionary value, follow the steps below:

  1. Locate UK value in the list.

  2. Check it.

  3. Click Delete button.