 FW Real Estate – Documentation
FWRE Layout Anywhere
FW Real Estate tutorial for Joomla!
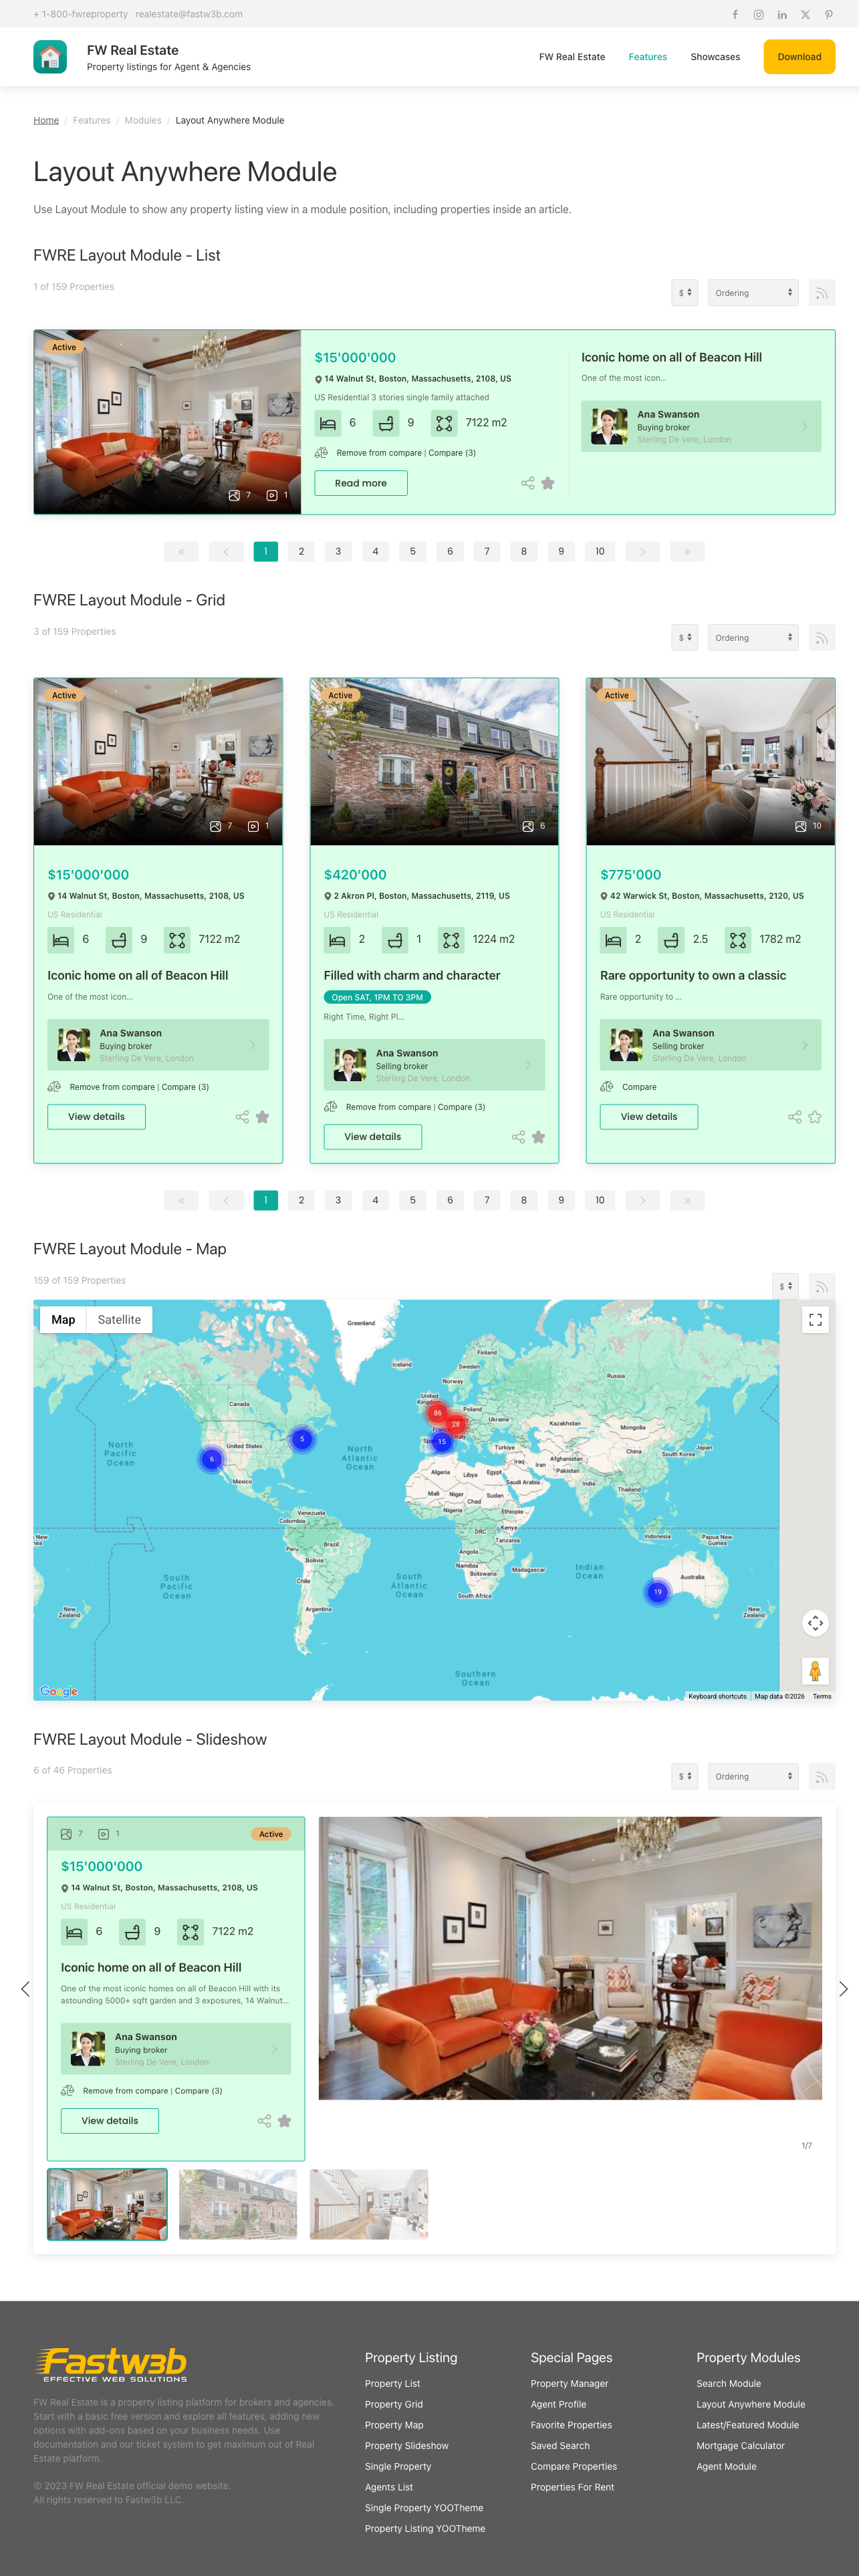
The FWRE Layout Anywhere module embeds a complete FW Real Estate property listing — including search filters, pagination, and all active plugins — or a single property detail view into any Joomla module position. This lets you place real estate content anywhere on your site without requiring a dedicated menu item pointing to the component.
Use Cases
- Homepage property section — embed a filtered listing (for example, six featured properties for sale in a specific city) directly on the homepage.
- Landing page — create a focused page for a single property type with the full listing and search experience embedded in the content area.
- Single property embed — display one specific property's full detail view inside an article or sidebar without navigating away from the page.
Creating a Module Instance
Go to Extensions → Modules → New and select FWRE Layout Anywhere from the module type list. Assign it to a module position and configure the parameters described below.
Module Parameters
| Parameter | Default | Description |
|---|---|---|
| Module class suffix | — | CSS class suffix appended to the module wrapper. |
| Module type | — | What to display: Property Listing or Single Property. |
| Theme | — | Design theme applied to the module output (uses the active FW Real Estate design template). |
| Layout | — | Listing layout: List, Grid, Map, Slideshow, Table, or Rotating Spotlight (displays one property at a time from a configured set of IDs, rotating randomly on each page load or at a configurable interval). |
| Country | — | Filter properties by one or more countries. |
| Region | — | Filter properties by one or more regions. |
| City | — | Filter properties by one or more cities. |
| Category | — | Filter properties by one or more categories. |
| Property type | — | Filter by type (Sale, Rent, etc.). |
| Status | — | Filter by status label. |
| Featured | — | Show all properties, featured only, or non-featured only. |
| Hide category list | No | Hide the category filter panel from the listing view. |
| Allow layout switching | Yes | Show the layout switcher (list/grid) to the visitor. |
| Description length | 200 | Number of characters shown in the property description excerpt. |
| Results limit | — | Maximum number of properties to display. |
| Single property | — | The specific property to display when Module type is set to Single Property. |
| Currency | — | Override the display currency for this module instance. |
| Addon params | — | Additional parameters injected by active plugins, such as search filters or the Rotating Spotlight property ID list. |
Notes
- This module renders the complete component output, including all active plugins, inside a module position — making it the most flexible placement option in FW Real Estate.
- Location filters (country, region, city) and content filters (category, property type, status, featured) can be combined to create a precisely targeted listing.
- When Module type is set to Single Property, all listing-related parameters are ignored and only the selected property's detail view is rendered.
- The Rotating Spotlight layout requires a comma-separated list of property IDs entered in the Addon params field. The rotation interval is configurable in seconds.
To install this addon, open the Add-ons panel inside FW Real Estate. See Getting Started → Add-ons for details on free addons, paid addons, and site verification.
Was this article helpful?