First, let’ enable Xmap plugin.
- Enable Xmap - FWRE Agency plugin. To learn how to enable the plugin, review steps 1-7 of How to configure FW content search plugin. Use the search bar to find a plugin. Your screen should look similar to the screenshot below.
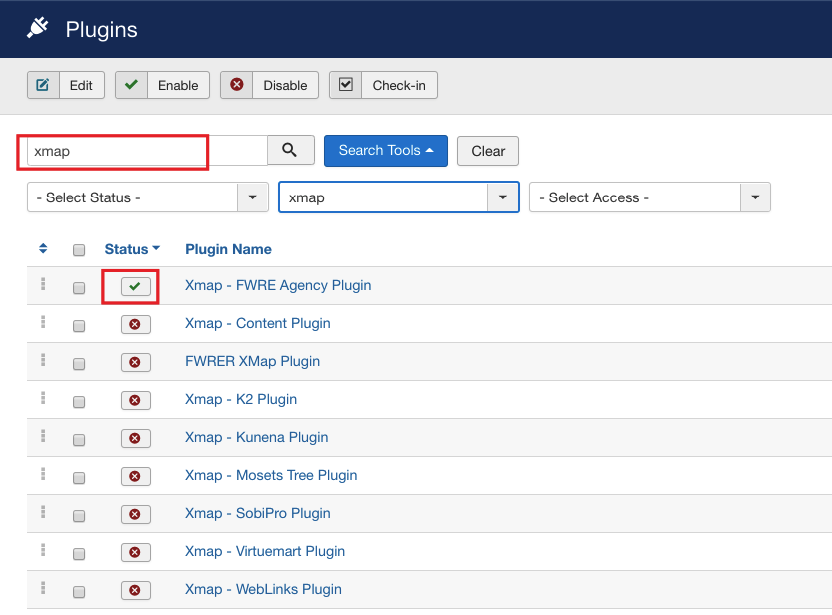
Once the plugin is enabled, let’s create a sitemap.
-
Locate Components dropdown in the top menu of your Joomla control panel and click on it.
-
Choose Xmap from the list.
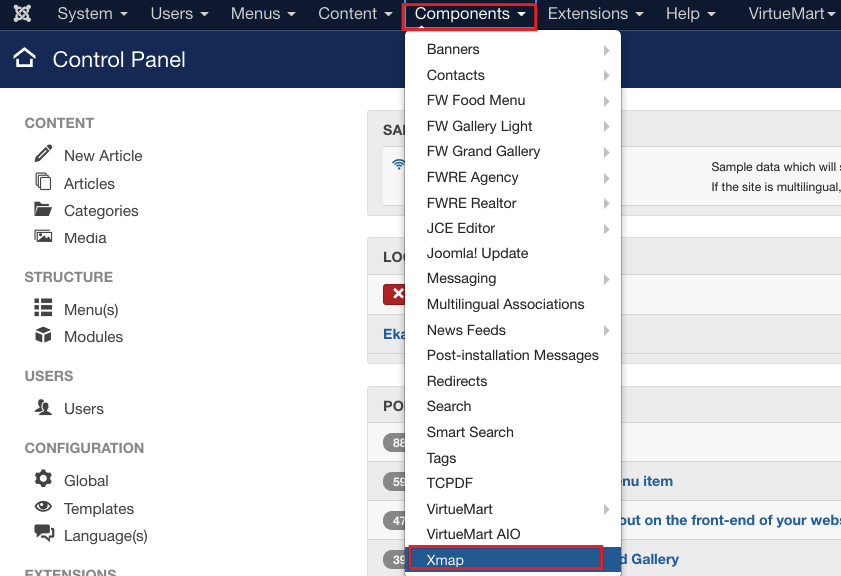
- Locate Sitemaps manager and Click New button.
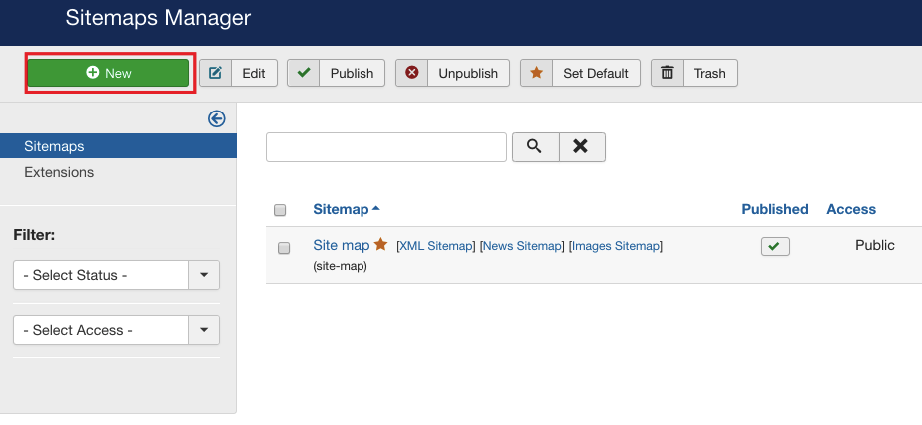
-
Locate Sitemap Details tab.
-
Mouse over Title and enter My Sitemap.
-
Locate Status dropdown and select Published.
-
Mouse over Access dropdown and select Public.
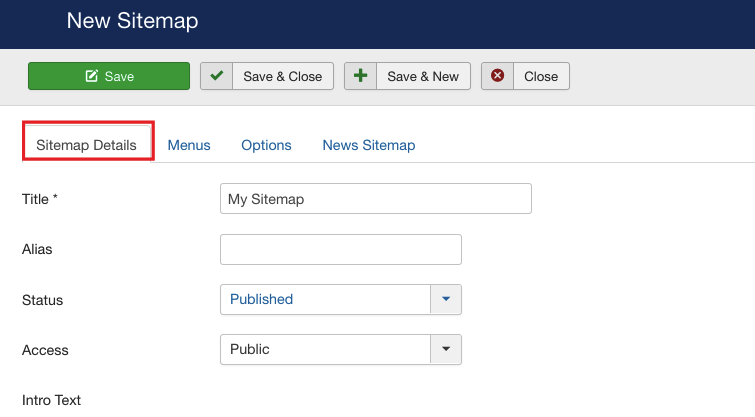
-
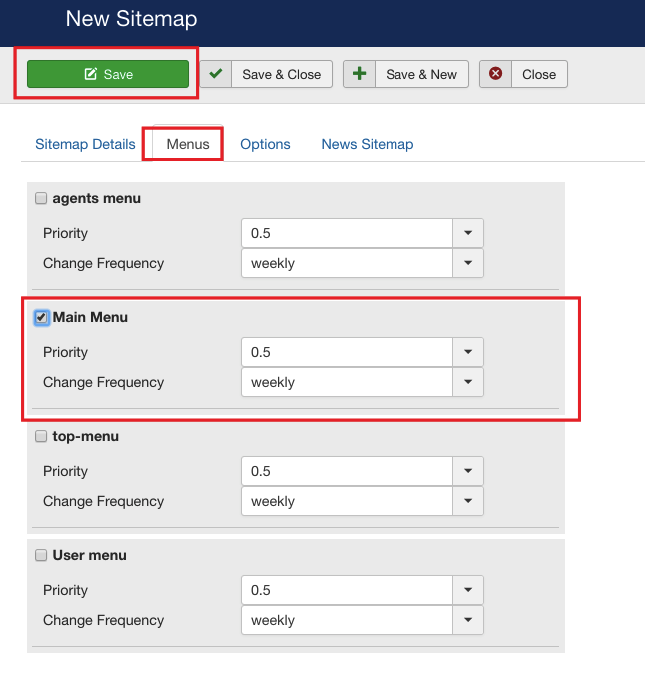
Switch to the Menus tab.
-
Check the Main Menu. As a result, the Xmap will generate the URLs for the selected menu, which will be subsequently indexed by the search engine.
-
Click Save button. Your screen should look similar to the screenshot below.
Now, we need to display a sitemap on the front-end. To make it happen, we need to create a menu item and assign Xmap layout to it.
-
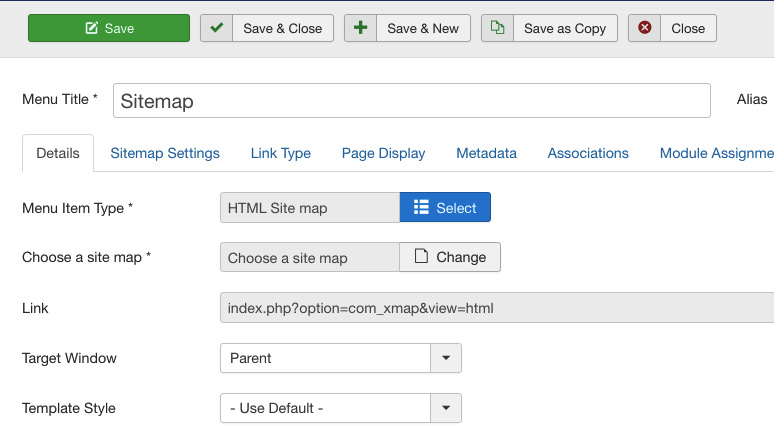
Create a Sitemap menu item. To learn how to create a menu item, repeat steps 1-6 of How to display galleries view tutorial.
-
Assign HTML Site map layout. To learn how to assign a layout, repeat steps 7-11of How to display galleries view tutorial.
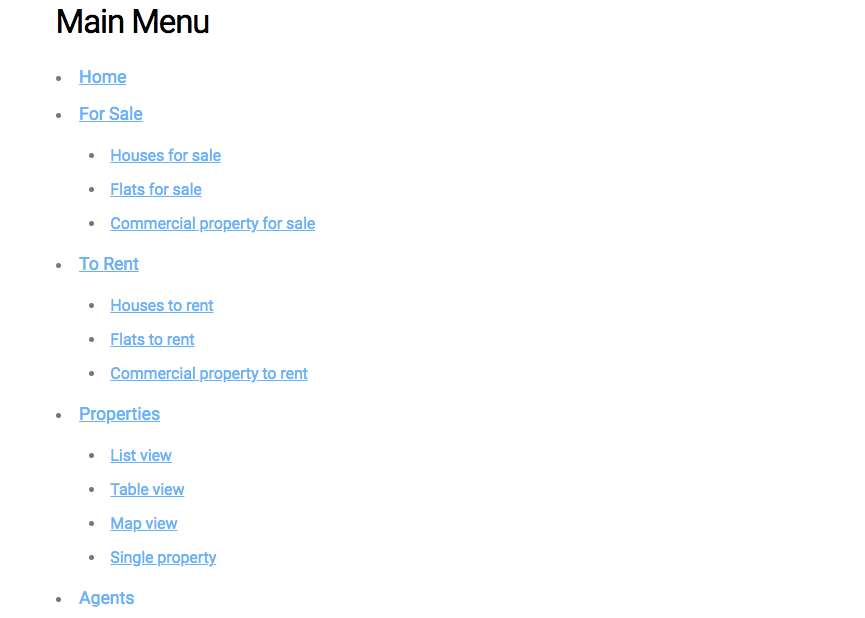
Once the settings are saved, go to the front-end to see how the newly created sitemap is displayed.
 FW Gallery
 FW Food Menu
 FW Virtuemart Rental
 FW Real Estate


