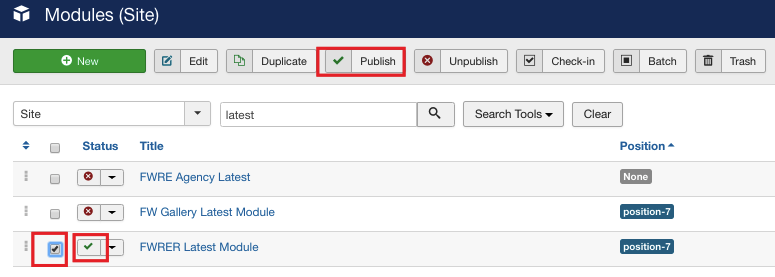
First, let’s enable FW Real Estate Latest module
-
Locate Modules section following Extensions=>Modules direction.
-
Find FW Real Estate Latest module using the search bar.
-
Enable it clicking the check button.

Now, let’s configure the module.
-
Click on the module title.
-
Locate Module tab and configure it. Assign the position to the module and give it a title. Use the sample parameters listed in the FW Real Estate latest module configuration and settings section of this tutorial. Your screen should look similar to the screenshot below.
-
Switch to the Menu Assignment tab.
-
Locate Module Assignment dropdown and select On all pages. Thus, the search will be displayed on all pages of your website.
-
Switch to the Options tab.
-
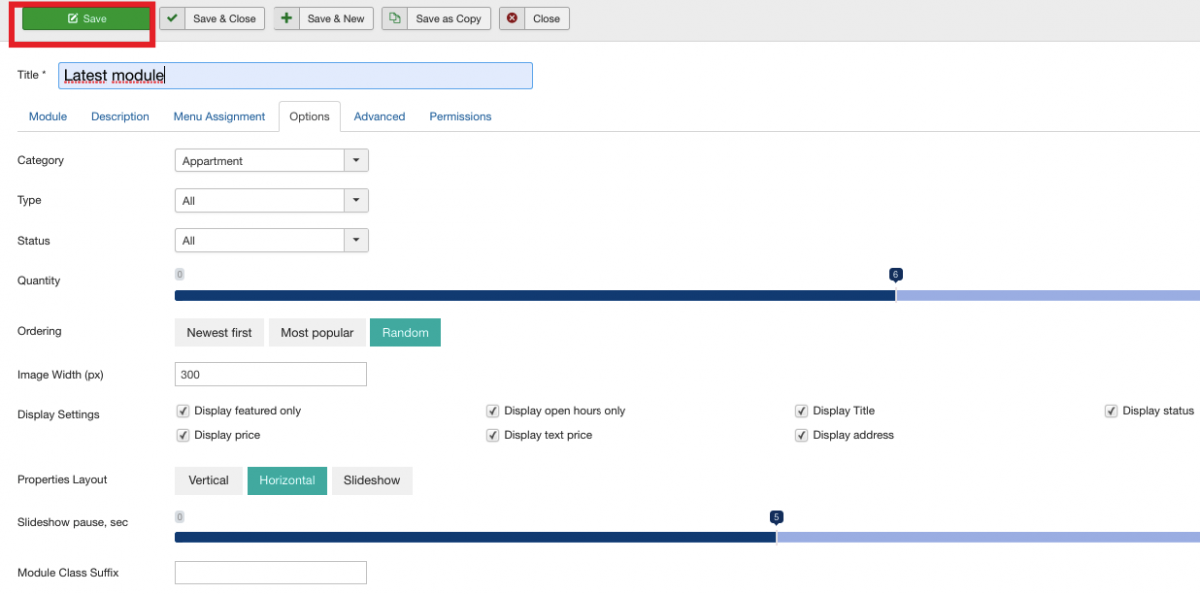
Locate Category dropdown and select All. Thus, all the images from all property categories will be displayed in the module.
-
Mouse over Type and select All. Thus, all property types will be displayed in the module.
-
Locate Status dropdown and select All. As a result, the properties with all statuses will be shown as in the module.
-
Mouse over Quantity slider control and set it as 6. Thus, 6 images will be shown in the module.
-
Locate Ordering field and select Random.
-
Go to the Image Width (px) textbox and enter 300.
-
Locate Display Settings groupbox.
-
Check all the parameters. Thus, these parameters will be displayed in the module.
-
Locate Properties layout and select Horizontal.
There are three module layout types available: Vertical, Horizontal, and Slideshow. Choose the one that suits your preferences.
- Click Save button. Your screen should look similar to the screenshot below.

Make sure to understand that the Slideshow pause option is used in pair with the slideshow property layout and allows to set intervals between the images within the slideshow.
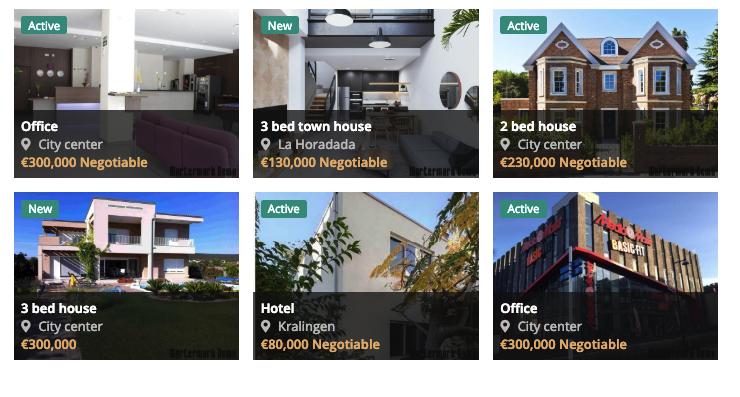
Once the settings are saved, go to the front-end to see how the module is displayed.

 FW Gallery
 FW Food Menu
 FW Virtuemart Rental
 FW Real Estate


