 FW Real Estate – Documentation
Basic Configuration
Basic Configuration
Follow these steps to get FW Real Estate ready before you publish properties. You do not have to complete every step before creating your first property — dictionaries and plugins can be added incrementally — but working through the list in order will save backtracking.
1. Set Your Default Country
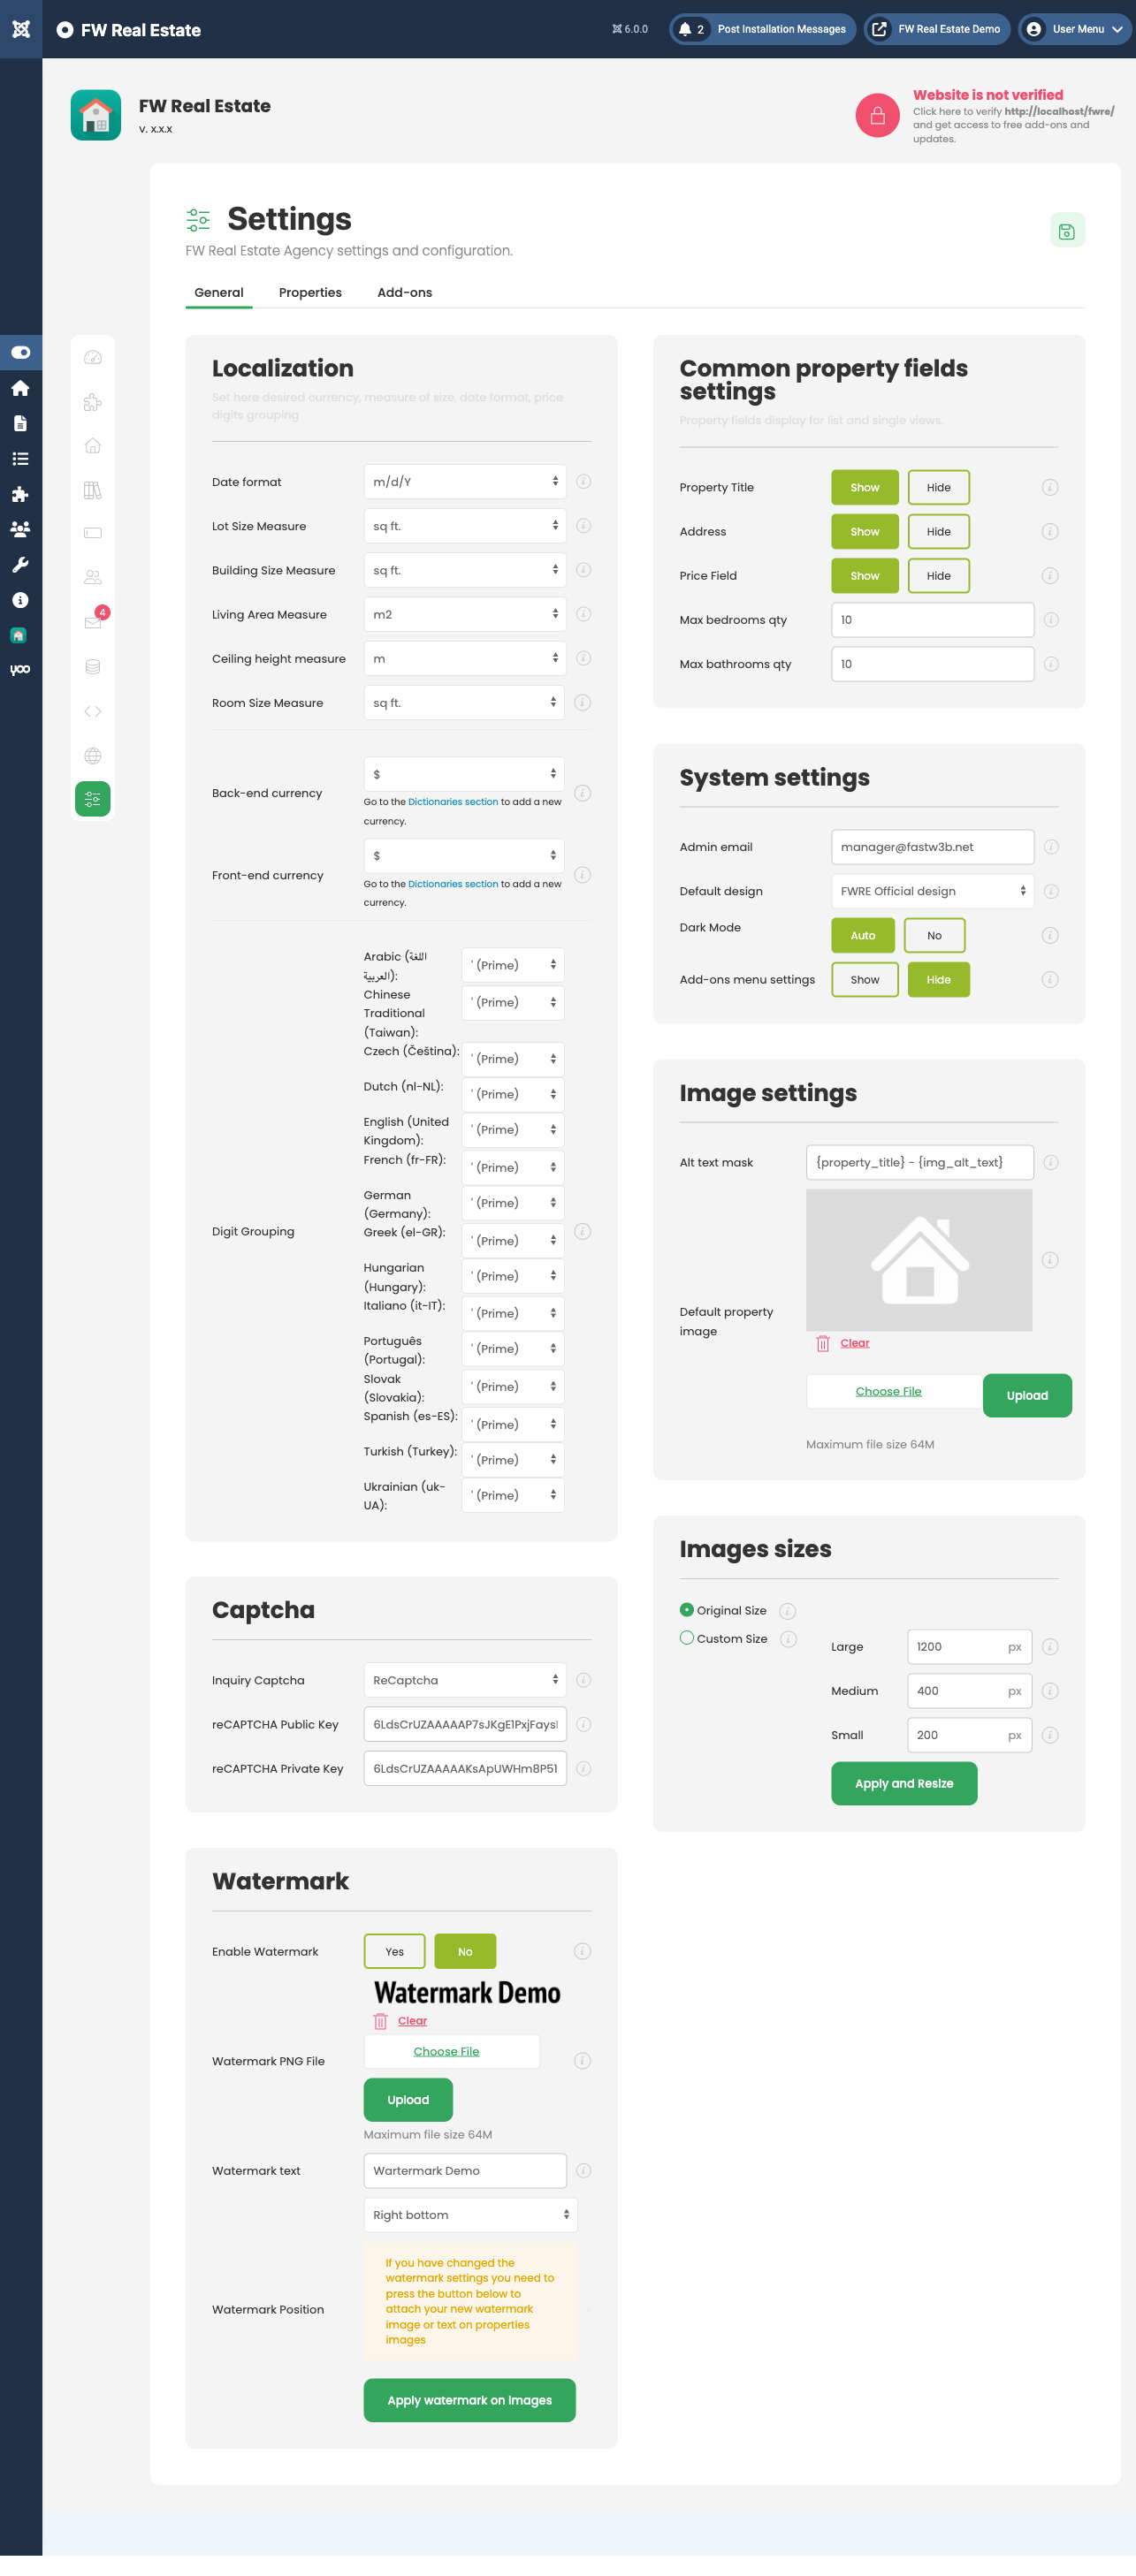
Go to FW Real Estate → Configuration → General. Under the Localization card, review the currency and measurement unit settings for your market. The Currency sign and Currency position fields cover single-currency setups. If you need multiple currencies, install the Multi Currency add-on — once active, it replaces these two fields with full currency management (covered in the Currency & Measurement Units section).
Also set your preferred measurement units for lot size, building size, living area, ceiling height, and room dimensions. These pull from the Measures dictionary, so add values there first if the dropdowns are empty.
2. Fill In Your Dictionaries
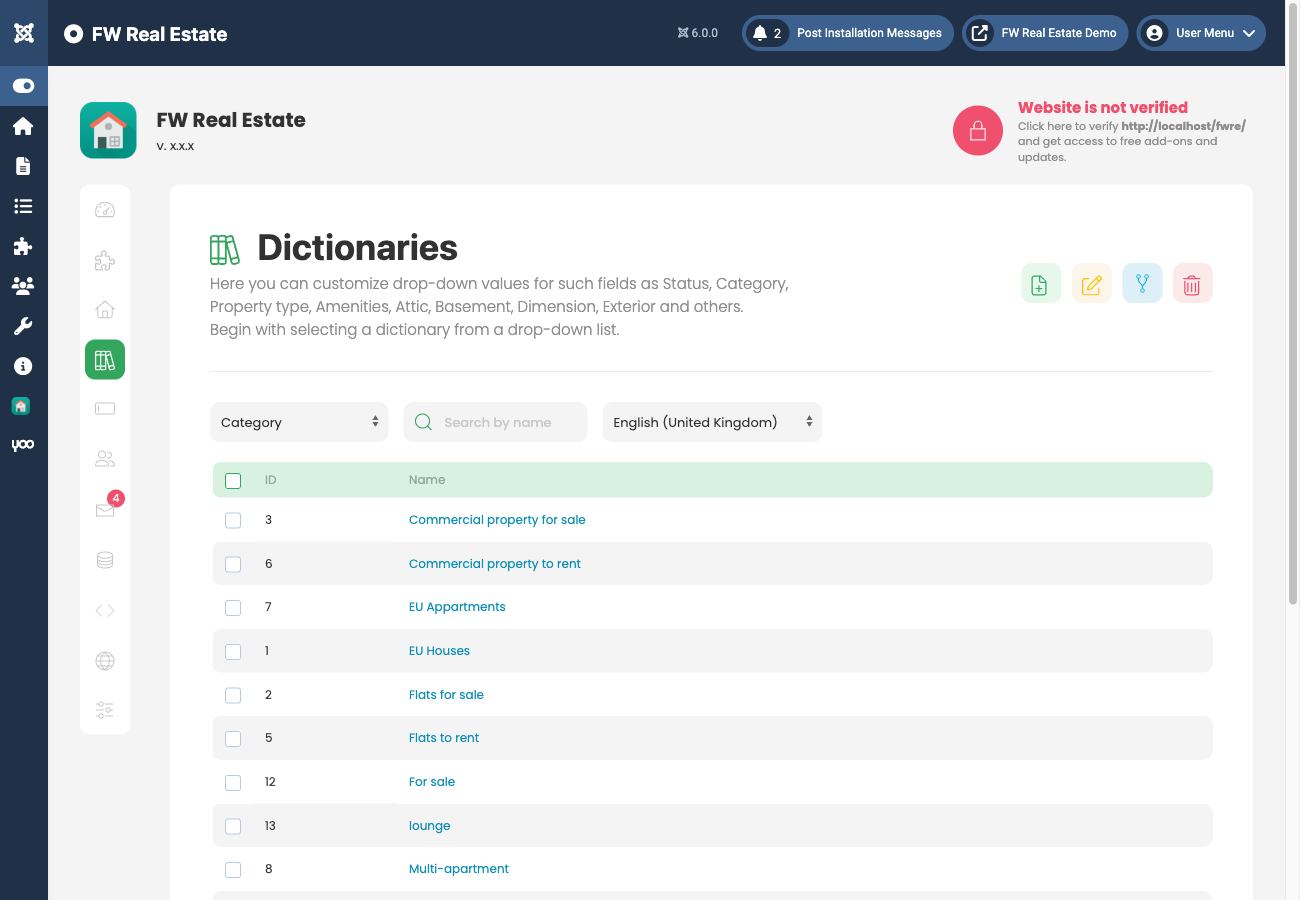
Go to FW Real Estate → Dictionaries. The core dictionaries you'll use most are:
- Countries, Regions, Cities — the address cascade on the property form. Add your country first, then regions, then cities. A city must have a region before it can be saved.
- Categories — property categories shown in the listing and search form.
- Types — house, apartment, commercial, land, and any other types you need.
You do not need to complete the dictionaries before creating properties. Any dictionary value can be added on the fly directly from the property form, so empty dictionaries do not block property creation. Fill in the address cascade first — that is the one area where order matters.
3. Create Your Menu Items
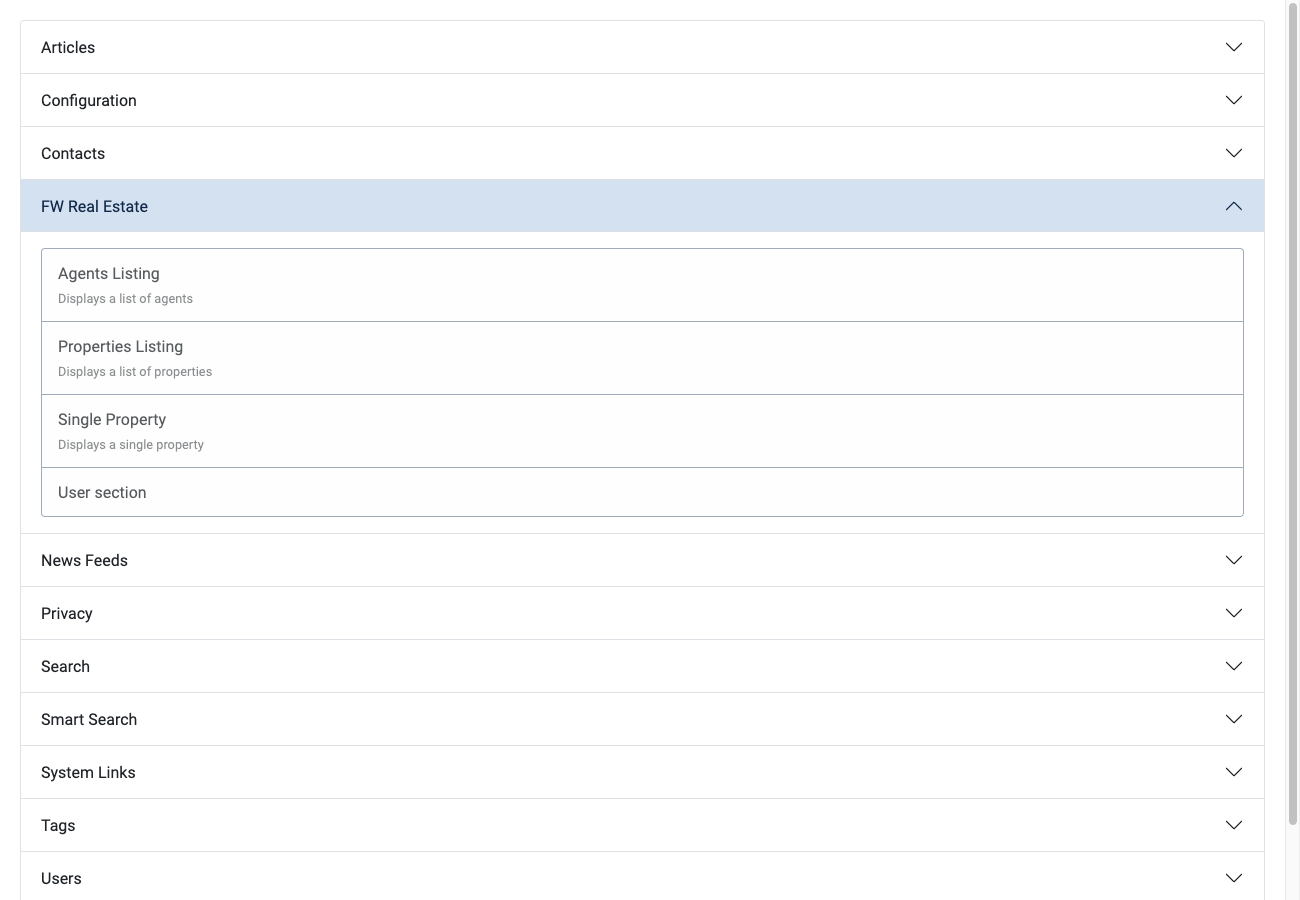
FW Real Estate front-end pages are placed using standard Joomla menu items. Create a menu item and choose one of the four available types:
- Properties Listing — the main property listing page. Page-level search filters are not built into this view. To add a search form, place the FWRE Search Module separately via a module position in Content → Site Modules.
- Single Property — a direct link to one specific property.
- Agents Listing — the agent directory. Requires the Agents add-on to be installed and enabled.
- User Section — the visitor account area. The Layout dropdown in this menu item is populated dynamically: only add-ons that are installed and enabled appear as layout options (Compare, Saved Search, Favorites, Property Manager, Agent Profile). A menu item can point to the account hub or be pinned to a single section.
The Options tab in any FW Real Estate menu item editor contains layout selection, pre-filter fields (scope by country, region, city, category, type, or status), and other listing settings. Some fields display Not available, need plugin until the relevant add-on is installed.
4. Enable Add-ons
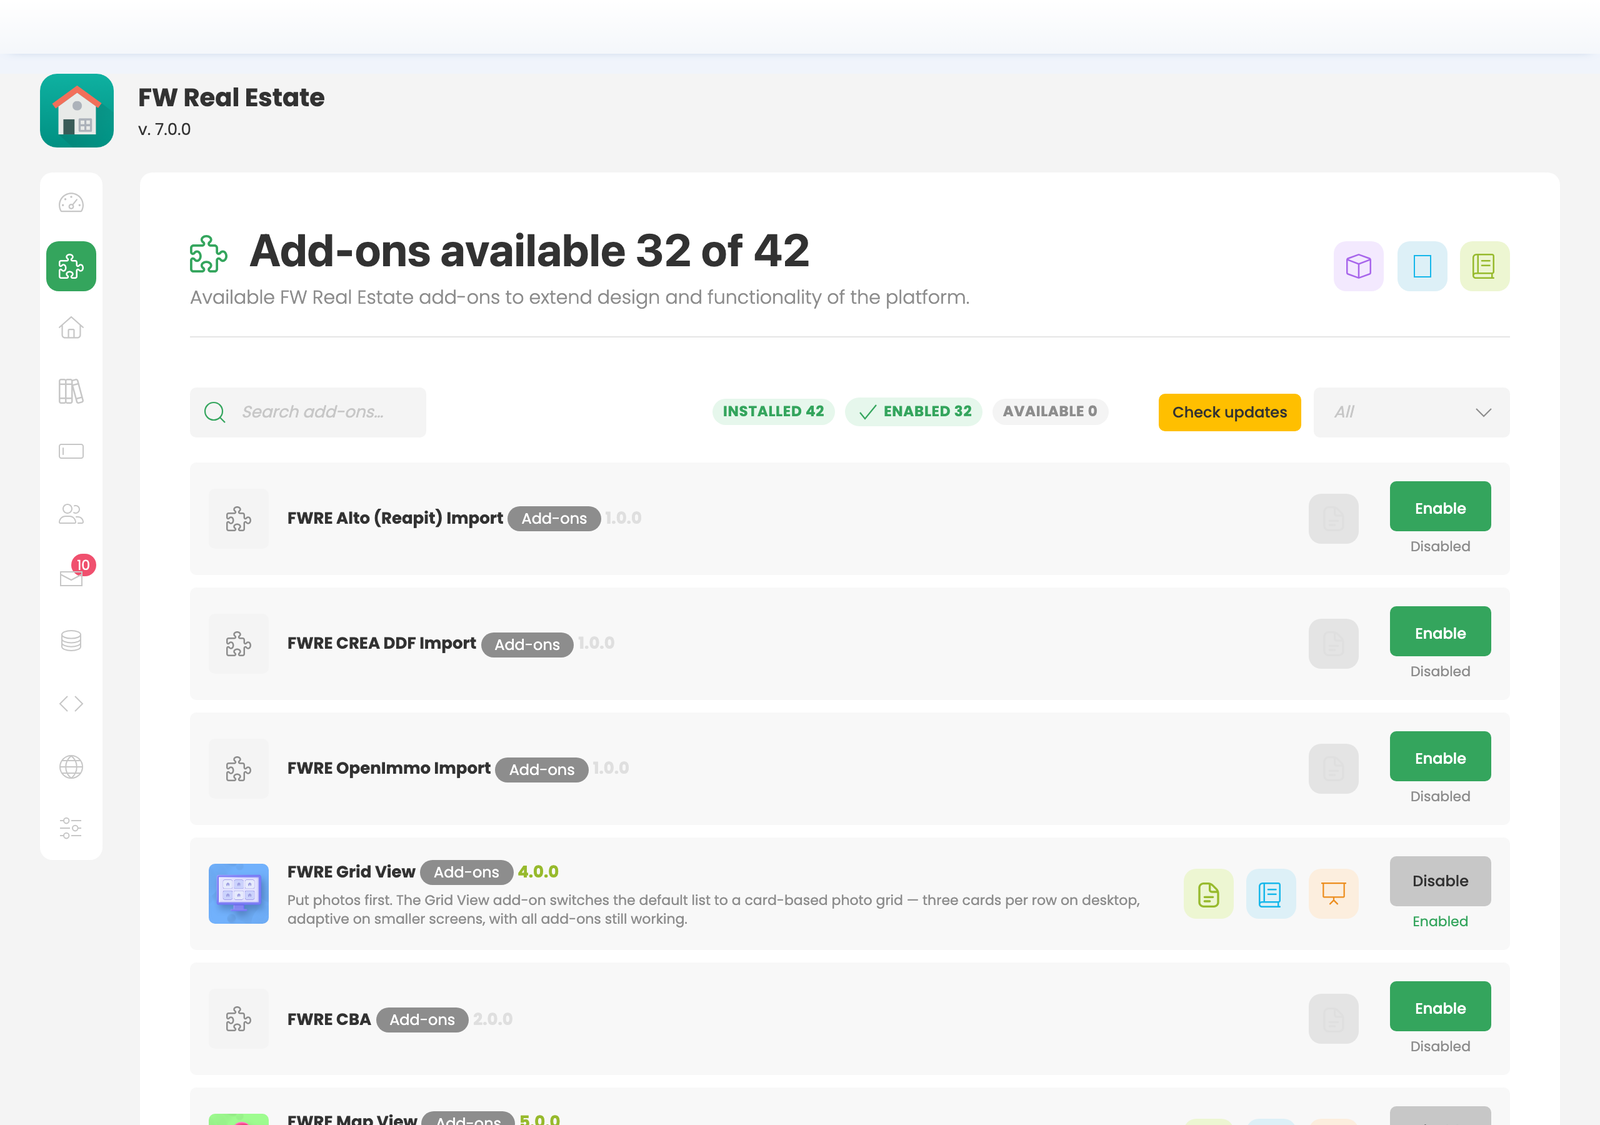
Go to FW Real Estate → Add-ons to enable the features your site needs. All plugins and modules are listed in one place here. You can also manage them individually through the standard Joomla Plugin Manager and Module Manager, where they appear in their respective sections.
When you enable a module add-on, FW Real Estate automatically installs a corresponding Joomla site module, which you then place and configure under Content → Site Modules like any other module.
Add-on-specific settings appear under Configuration → Add-ons — one card per enabled add-on. If the tab appears empty, no add-ons are currently enabled.