Create Your First Property
This section walks through the shortest path from a freshly installed FW Real Estate to a live, viewable property on your site. The whole thing usually takes under 10 minutes.
Step 1: Open the Admin
In your WordPress admin, open FW Real Estate → Properties. This is where every property you create will live.
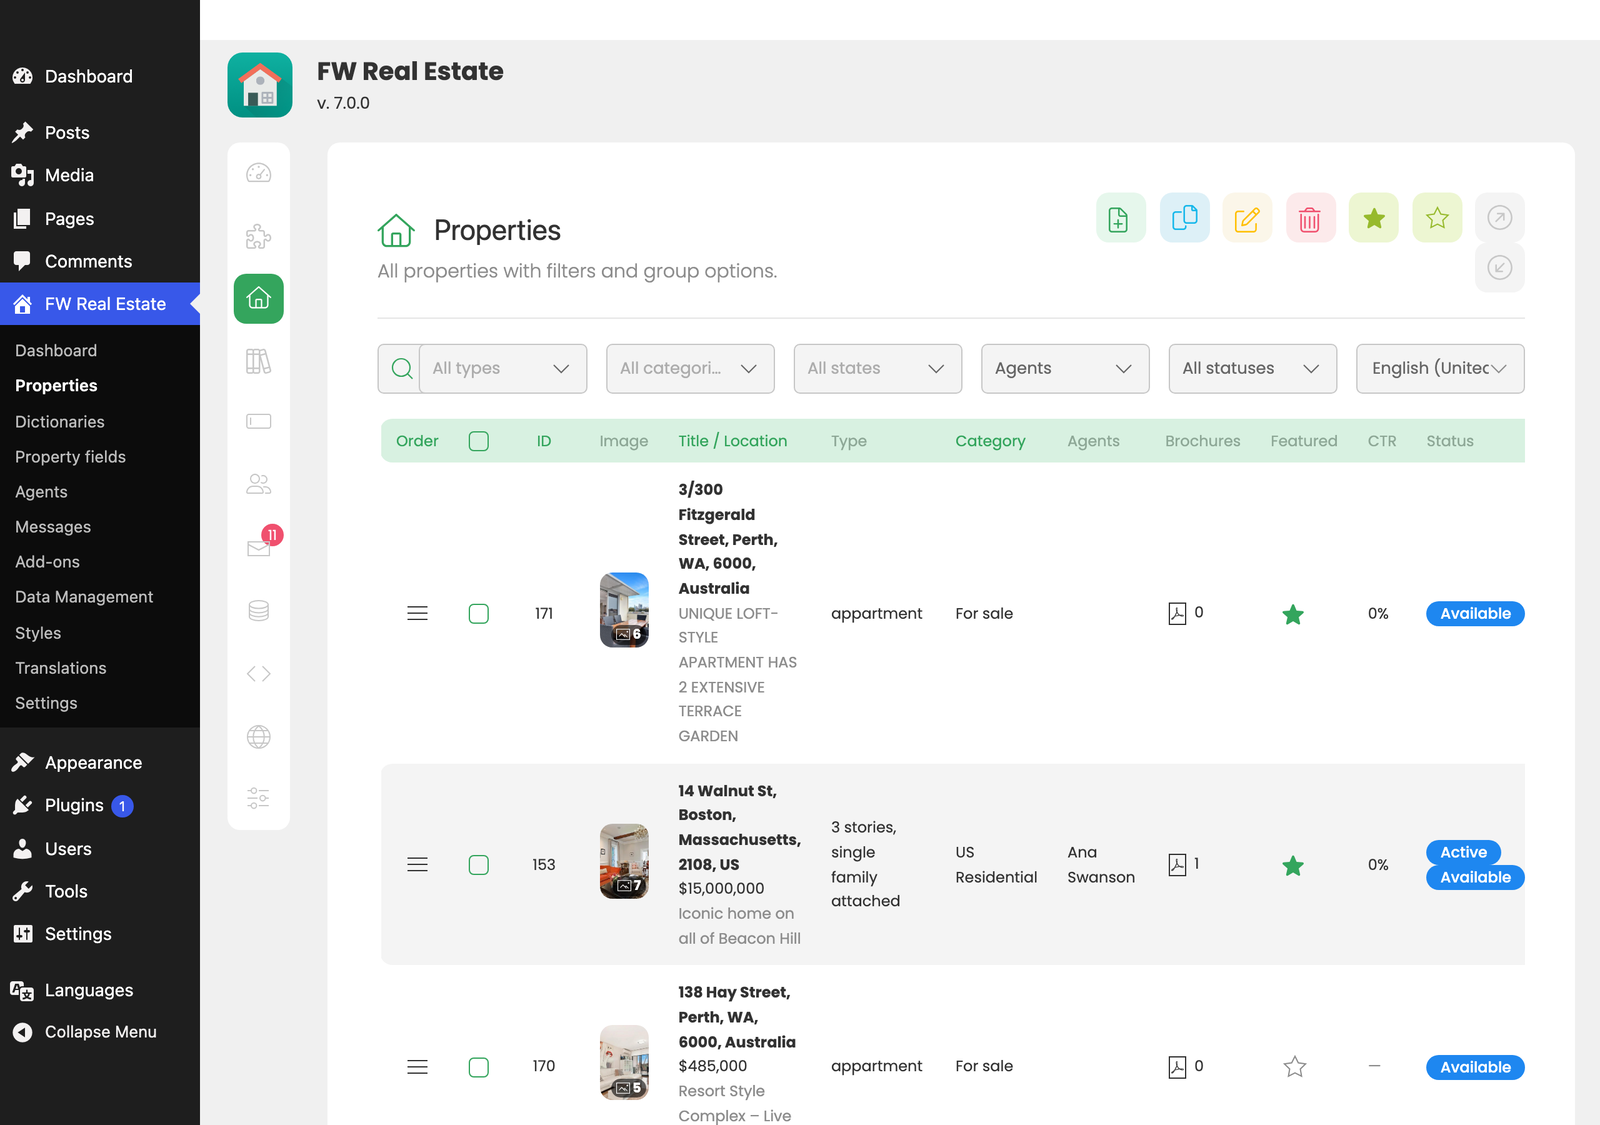
Step 2: Add Your First Property
Click New (or the green plus button). The property editor opens with all the fields you'll need on a single form. No fields are required by default. Filling in title, type, price, address, and at least one photo is enough for a meaningful first record.
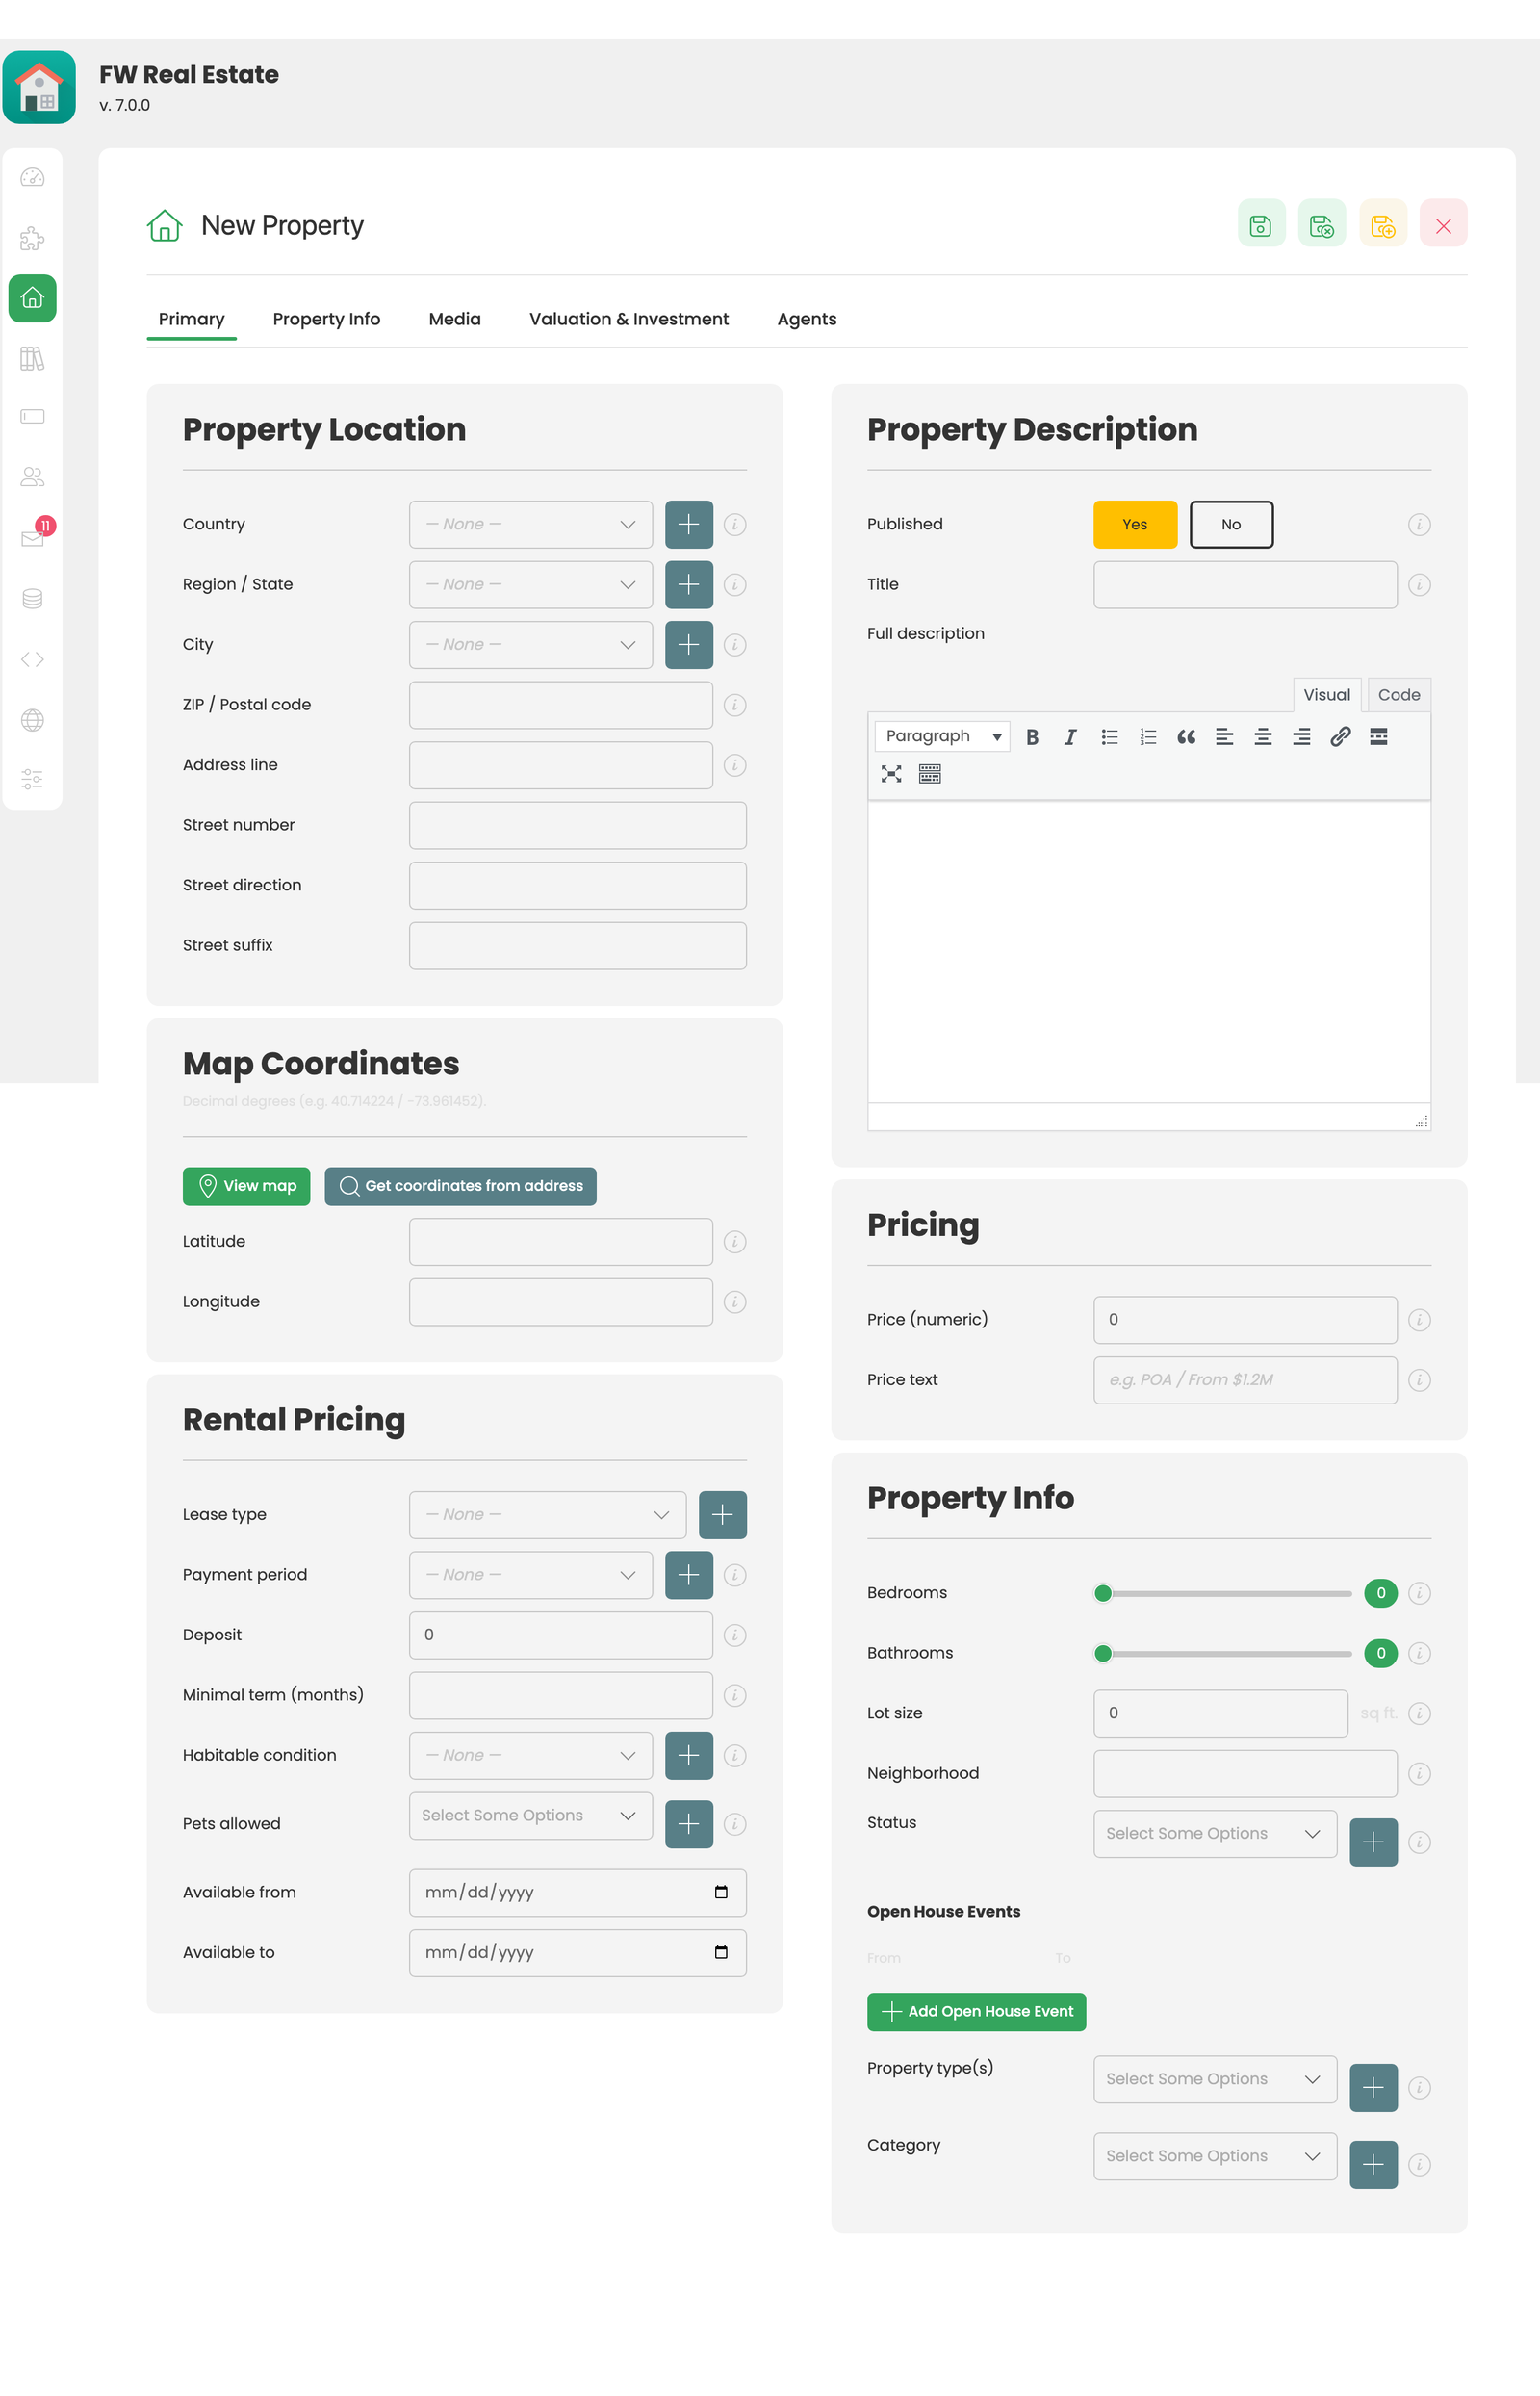
Fill in the basics and click Save. Don't worry about getting everything right the first time; every field is editable, and there's no hidden penalty for incomplete records during setup.
Step 3: Publish It
Toggle Published to Yes in the publishing panel and save. You can also flip the green dot from the properties list without opening the editor.
Step 4: View It on the Frontend
Create a WordPress page, add the FW Real Estate Listing block (or the [fw_real_estate] shortcode) to it, publish, and view it on the front end. The new property appears in the list, styled by the bundled Official design.
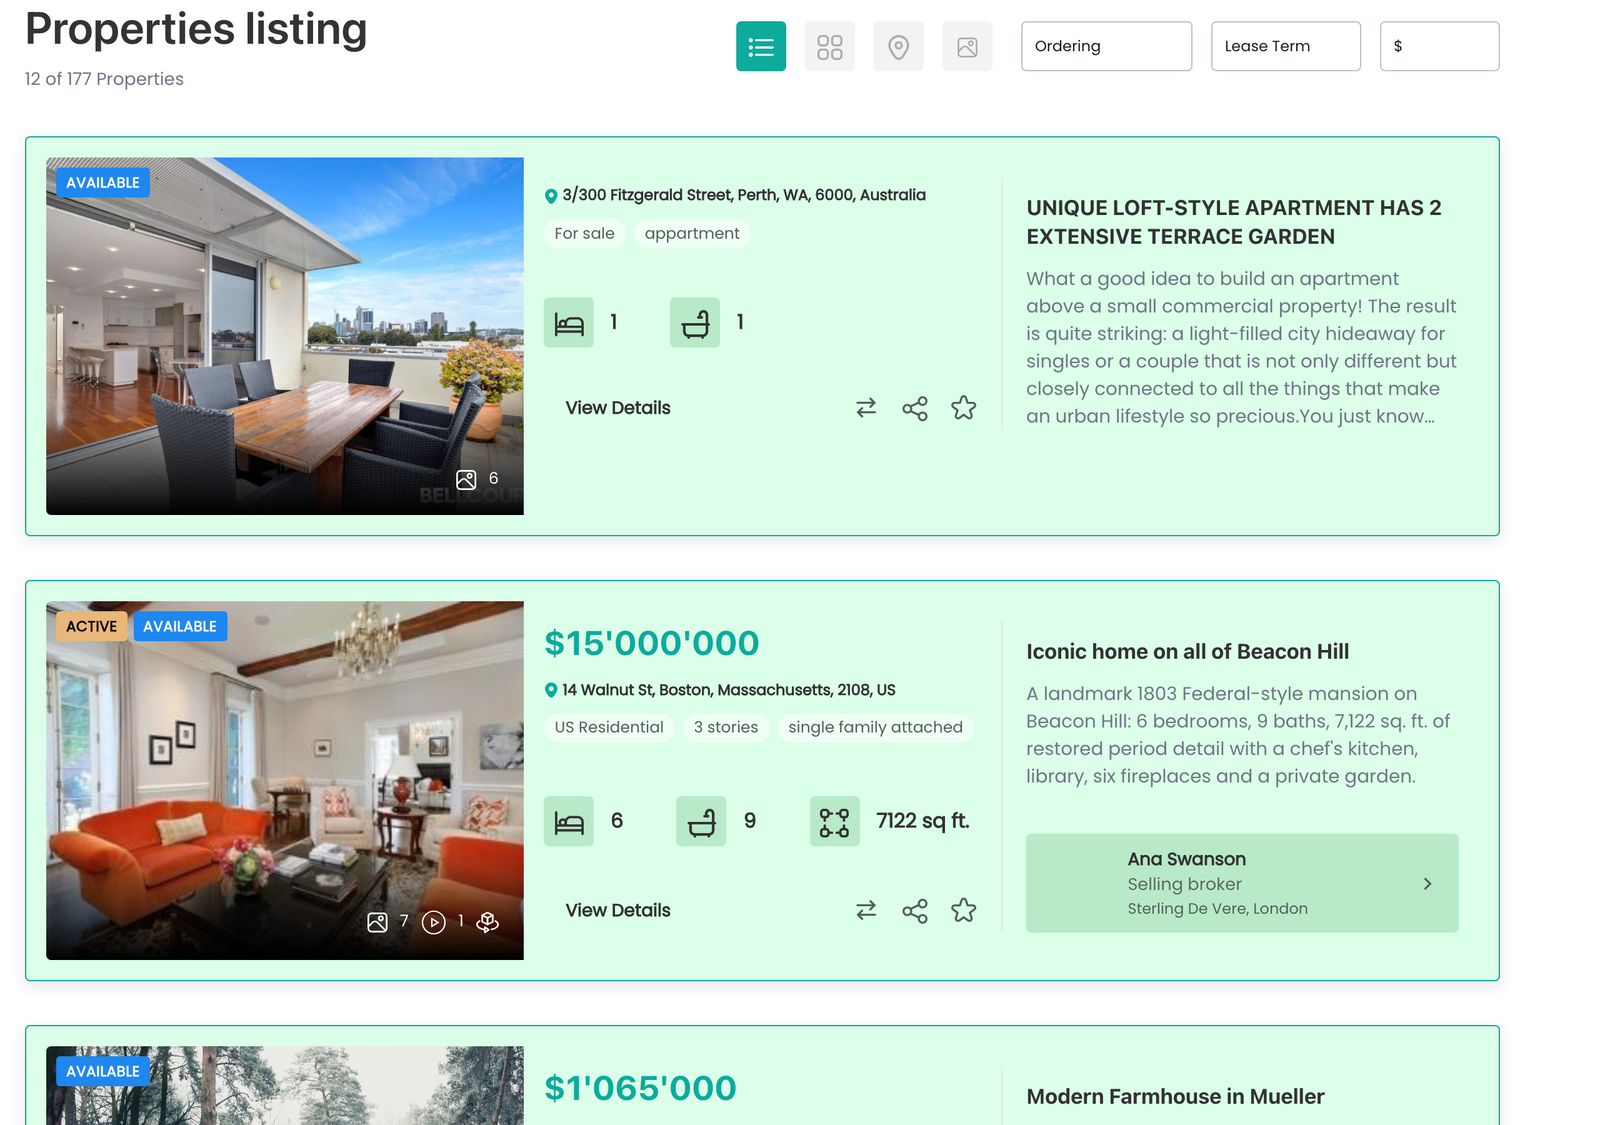
You're Live
That's the minimum. Everything from here is layering: more properties, more layouts, more add-ons. The Common Tasks section links to the next things most users want to do.

